If you are new to AWS and Virtual Private Clouds (VPC), we suggest you start with the Getting Started with MarkLogic Data Hub Service on AWS tutorial. This tutorial assumes you are comfortable working with AWS and VPCs.
When hosting your application in an AWS VPC, having a private MarkLogic VPC with peering configured is recommended. This tutorial covers configuring a private MarkLogic Data Hub Service VPC, along with configuring the peering required to allow your VPC to communicate with the provisioned MarkLogic VPC.
You should have already created your Amazon and MarkLogic cloud service accounts, as described in the previous installment.
Data Hub Service Architectural Overview
Here are the server and network resources that we want to establish:
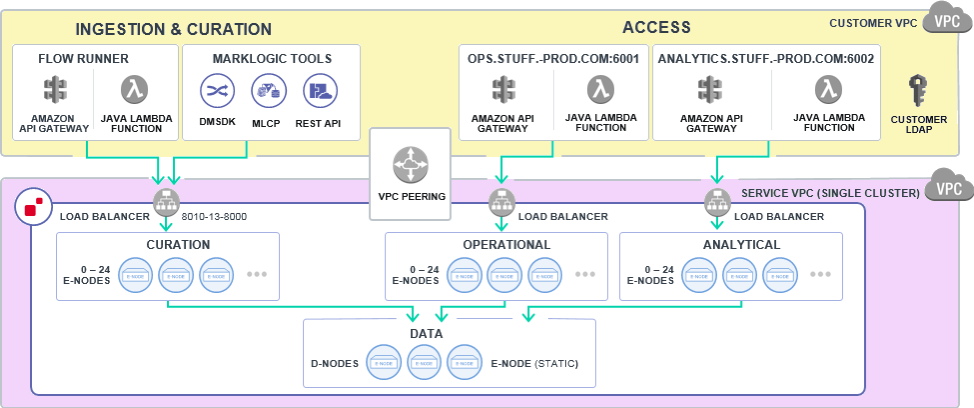
Figure 1: Server and network resources to be established
The “Customer VPC” will be managed by the customer, and the “Service VPC” is managed by MarkLogic. Systems accessing the data hub like front-end GUI, background applications, and LDAP servers, can be hosted on servers in the Customer VPC. Since “Service VPC” is private, “VPC Peering” is required to allow communication between the “Customer VPC” and the “Service VPC”.
The AWS documentation has more information about Amazon’s VPC and VPC Peering.
Refer to the Resource Checklist in the Appendix to help track the various pieces of information we will generate and use.
Create Customer VPC
The MarkLogic Data Hub Service requires the Customer VPC to be in the same region as the Service VPC. Accordingly, please take note of the supported regions for the MarkLogic Data Hub Service:
| Region | Identifier |
| US West (Oregon) | us-west-2 |
| US East (N. Virginia) | us-east-1 |
| US East (Ohio) | us-east-2 |
| EU West (Ireland) | eu-west-1 |
| EU West (London) | eu-west-2 |
| EU Central Frankfurt | eu-central-1 |
| Asia Pacific (Sydney) | ap-southeast-2 |
| Asia Pacific (Singapore) | ap-southeast-1 |
| Asia Pacific (Tokyo) | ap-northeast-1 |
Note: The AWS GovCloud is not currently supported.
If your company has its own policies for establishing VPCs, take note of the following information:
| VPC ID | If you used a template to launch a VPC, use the VPC ID that gets generated. |
| AWS Account ID | https://docs.aws.amazon.com/IAM/latest/UserGuide/console_account-alias.html |
| User Subnet CIDRs | Can have from 1 to 6 User Subnets CIDRs. If you are running your clients or application servers across three availability zones, you must provide all of the subnet CIDRs. If your service is running in a single zone, just provide one CIDR. |
Otherwise, we must create a private VPC with a bastion host as the single access point.
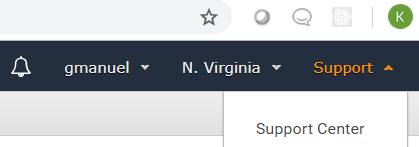
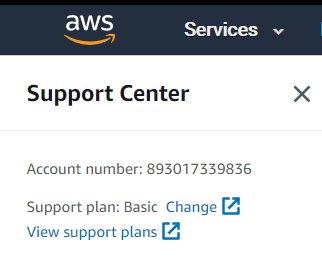
- Note your AWS Account number, found in the Support Center.
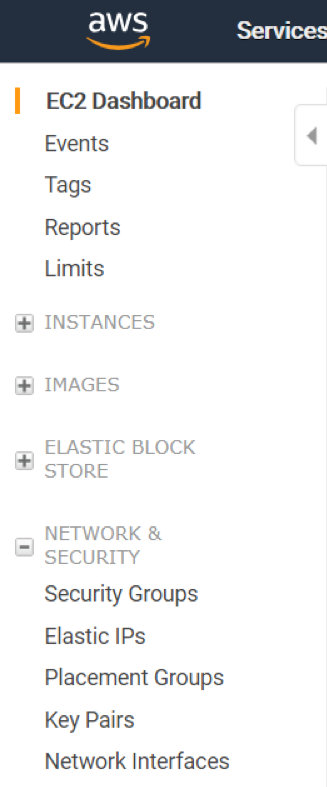
- Go to EC2 Console.
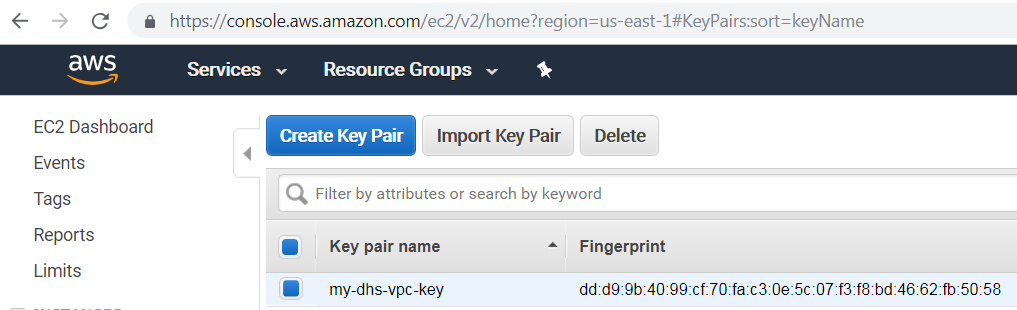
- Under “Network and Security” on the left-hand side panel, click on “Key Pairs”:
- Click on “Create Key Pair.”
- Provide a name and save the certificate file somewhere safe and secure. You should end up with something like the following:
- Note that you would need to create separate key-pair for each region.
- Please secure the generated certificate file as this would grant root level ssh access to the bastion server that would get provisioned.
- Write down your “Key Pair Name,” we will be using this later.
- Go to your Amazon Console and look for “CloudFormation” under “Management Tools”:
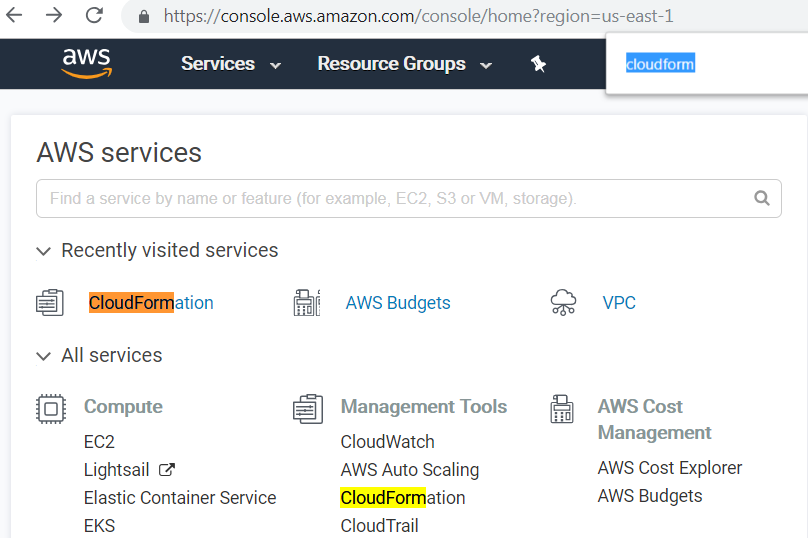
- Create a new stack (with new resources) by specifying an Amazon S3 template URL (example template). If you decide to use more than three availability zones, download the above template and modify the file to add more entries for private and public subnets, route associations, etc., then use “Upload a template to Amazon S3” as the option when creating a CloudFormation stack instead of using the example template.
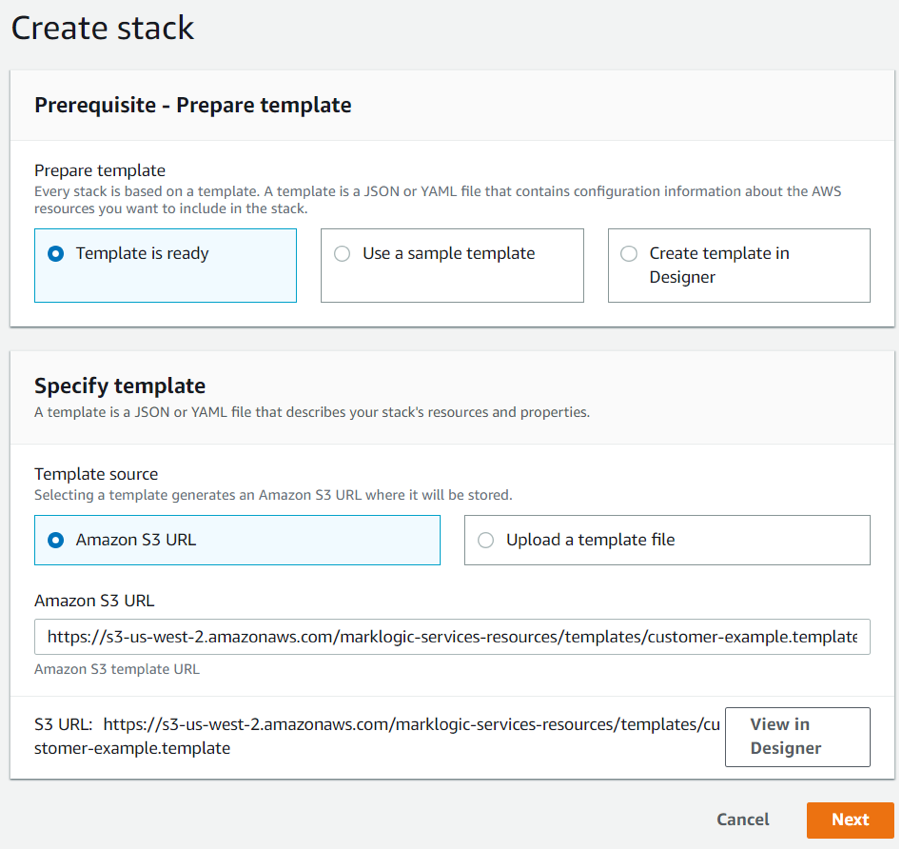 Figure 2: Create Stack Interface
 - Select three of your preferred availability zones. Data Hub Service requires at least three availability zones to ensure high availability (HA). Should one availability zone collapse, the cluster would continue to function. The above example template has a max of three availability zones. (You are not required to use three. For this example we will be using only one.)
- If you did not use the example template and your existing VPC has an IP overlap with the default values, adjust the various Classless Inter-Domain Routing (CIDR) values. CIDR is used to allocate an IP address for each subnet. More information about how these CIDR values are used is available in the AWS VPC User Guide.
- Provide the key name generated in the previous section “Create your Key Pairs”, i.e. in this case my-dhs-vpc-key, in the EC2 Key Name field.
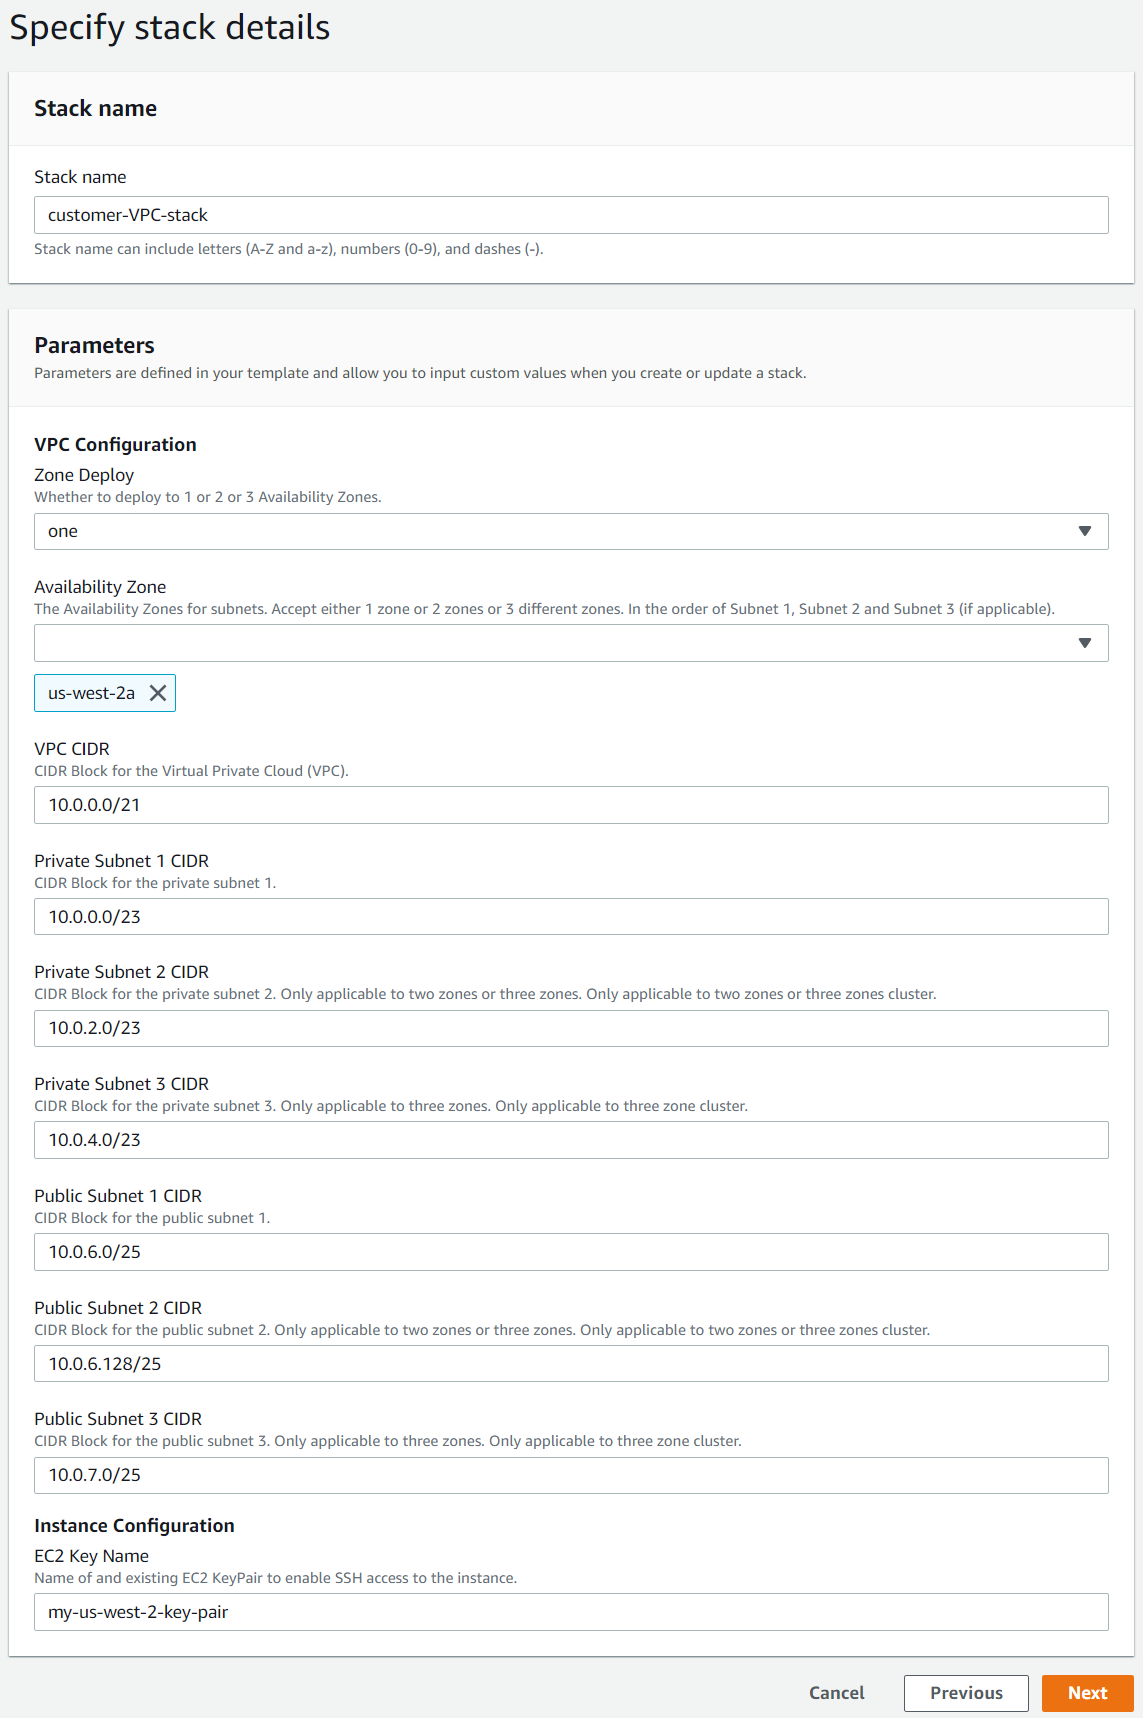 Figure 3: Stack detail specifications. Note: If you only selected one region, leave the other subnet’s CIDRs filled with the defaults. Just take note of the first private and public subnet CIDRs.
 - You can specify your IAM roles in the options page following the above form and then review and proceed to the last page. Creating a stack can take a while to complete, but you should eventually see something similar to the following:
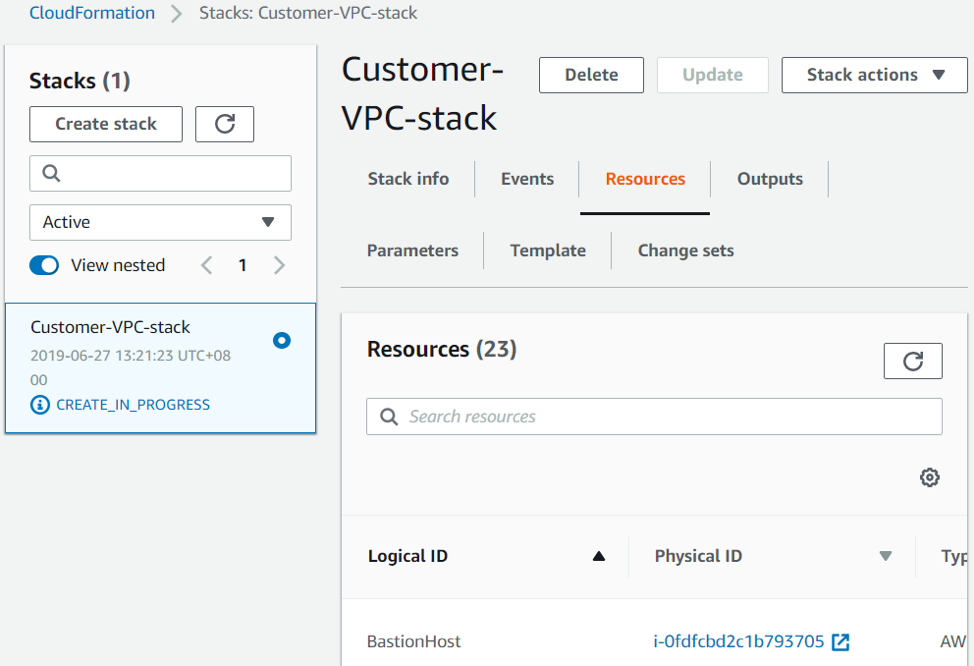
There are a few things that you should take note of now and use later. We will specify them here for you down below. Firstly, take note of the BastionHostIP, PrivateSubnetRouteTableID and PublicSubnetRouteTableID by clicking on the “Outputs” tab:
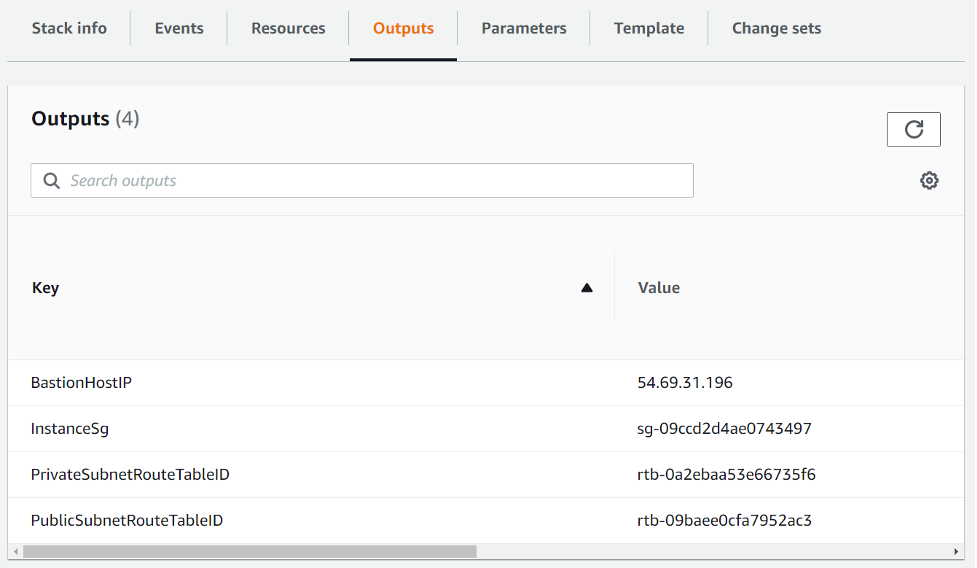
Figure 4: BastionHostIP
Switch over to the “Resources” tab and look for “MarkLogicVPC” as shown below; note the VPC ID which we will use later:
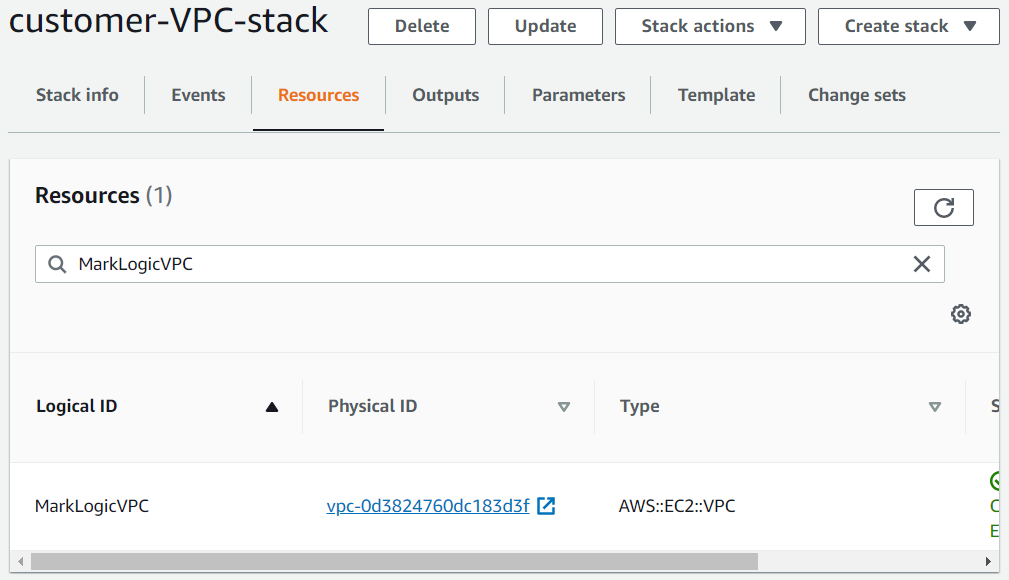
Figure 5: VPC ID
If you forgot to note down the CIDRs that got used, you can pick them up from the “Parameters” tab as shown below:
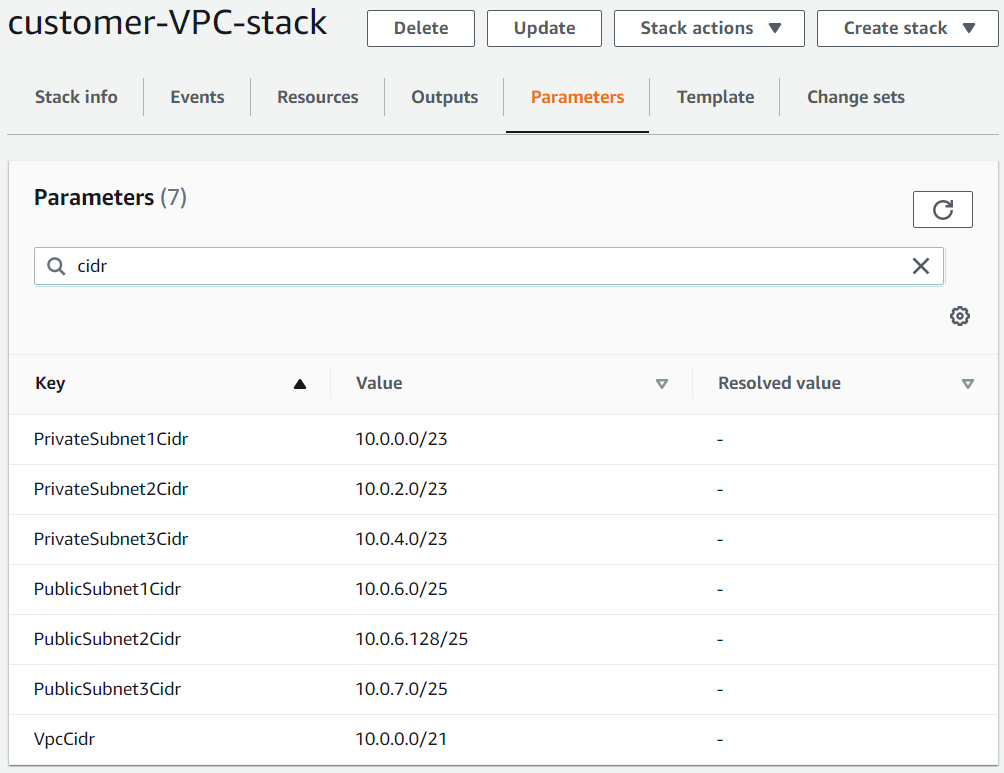
Figure 6: Public and private CIDRs
Alternatively, the CIDRs can be picked up from the “Subnets” from amazon console:
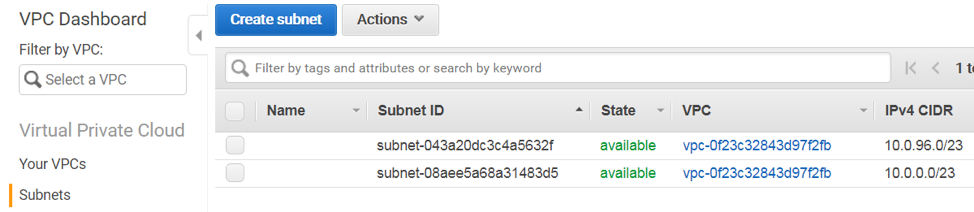
To obtain your MarkLogic Service ID, which we will be using later, go to the MarkLogic Cloud Service homepage and click on your name in the upper right hand corner of the page:
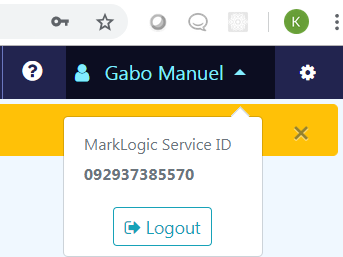
Figure 7: MarkLogic Service ID
Create the VPC Peer Role
As shown in the diagram in Figure 1, we need to allow the “Customer VPC” to communicate with the MarkLogic VPC by creating a peer role. More information about VPC peering is available in the AWS VPC Peering Documentation.
- Go to your Amazon console and look for “CloudFormation” under “Management Tools.”
- Create a new CloudFormation stack using this peer role template.
- Complete the form below using the information we have gathered so far. Refer to Figure 5 for the MarkLogic Service ID and to Figure 6 for the VPC ID, both from the Create Customer VPC section.

- Click “Next” to proceed.
- Specify your IAM roles in the options page following the above form.
- Click on the “I acknowledge that AWS CloudFormation might create IAM resources” and click “Create.”
This can take a while to complete, but you should eventually have something like the following at the end. Note the RoleARN in the “Outputs” tab; we will be using it later.
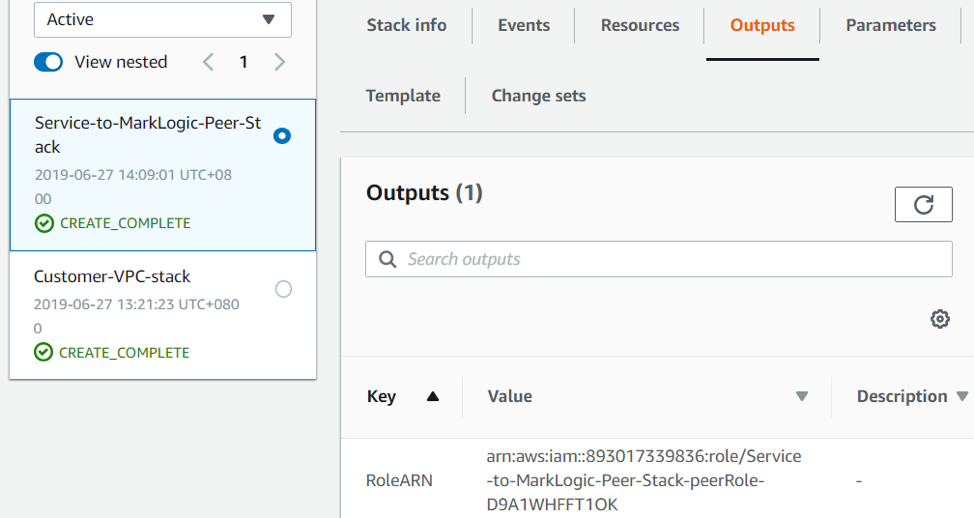
Figure 8: CloudFormation stack details with RoleARN in the Outputs tab
Configure MarkLogic Network
- Return to Cloud Services and click on the “Network” tab.

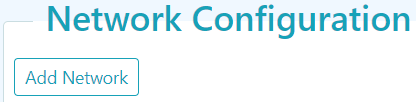
- Click on the “Add Network” button. Note that this button may appear on the right if your screen is wider than 1255px.
- Input the “Name” and preferred “Region” to configure the network. As a reminder, the Service VPC and the Customer VPC has to be in the same region.
- Check the peering option and supply the information we have gathered thus far.
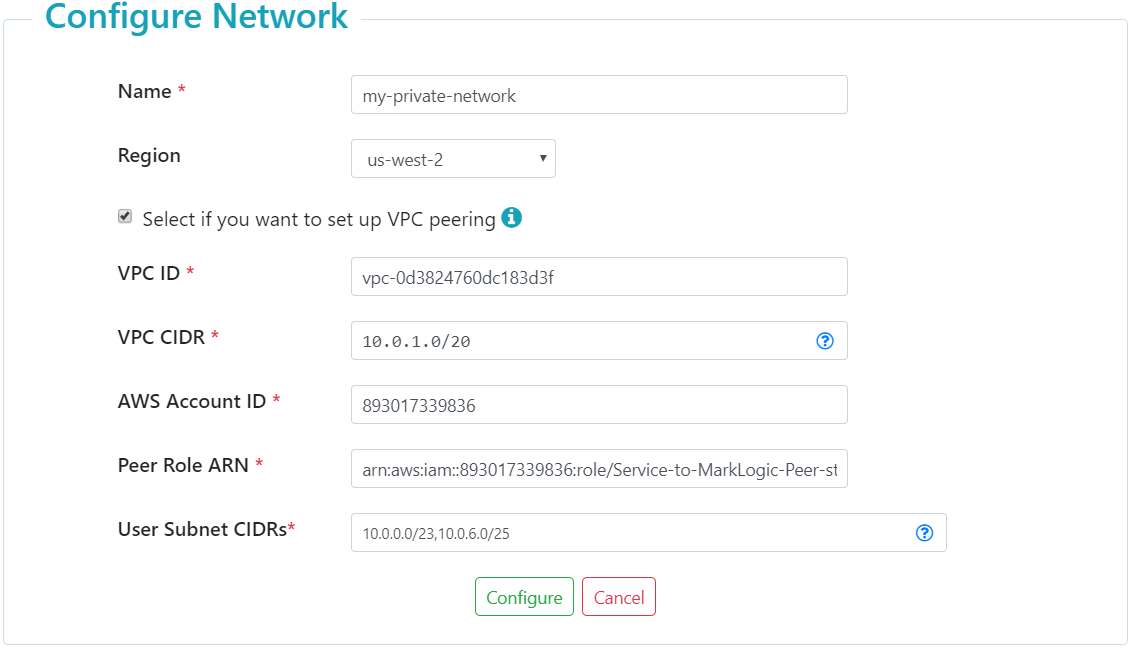 Figure 9: Network Configuration
- VPC ID is the AWS VPC ID from Figure 6 of the Create Customer VPC section.
- Peer Role ARN is from Figure 9 of the Create the VPC Peer Role section. Do not include the trailing space/tab when you copy from a web page to this form.
- User Subnet CIDRs are all of the public and private subnet CIDRs from Figure 7 of the Create Customer VPC section.
- VPC CIDR is the CIDR for the MarkLogic VPC at the bottom of Figure 1 in the Data Hub Service Architectural Overview section. This can be left as is (10.0.1.0/20), if you used the default values during the steps in Create Customer VPC. Make sure that the value does not overlap with the User Subnet CIDR blocks.
- Click on the “Configure” button shown above.
This may take a while to complete… Make sure to hit the refresh button on the right every now and then. Eventually, you will see that network configuration has completed. Take note of the Peering Connection ID. Additionally, take note of the public and private CIDRs generated. We would be using these later.
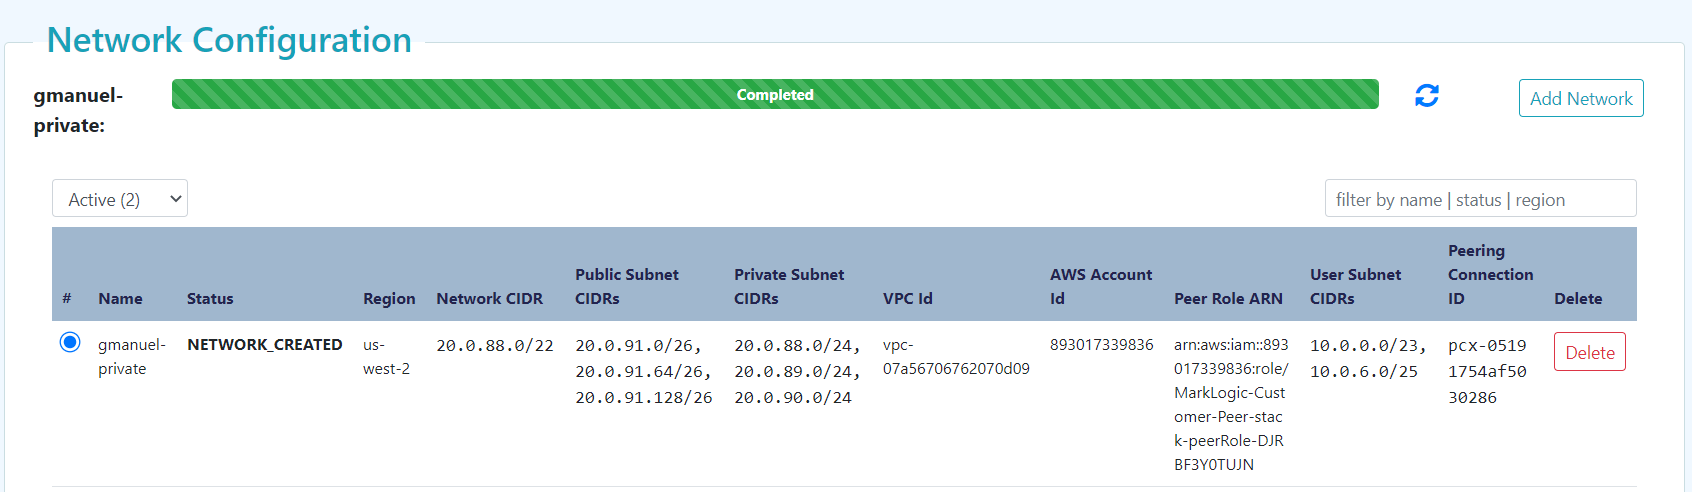 Figure 10: Network configuration completion status with Peering Connection ID and public and private CIDRs generated
Create the Data Hub Service VPC
On the MarkLogic Cloud Services homepage, click on the “+ Data Hub Service” tab to create an instance, make sure to select “Private Access,” and supply the following information:
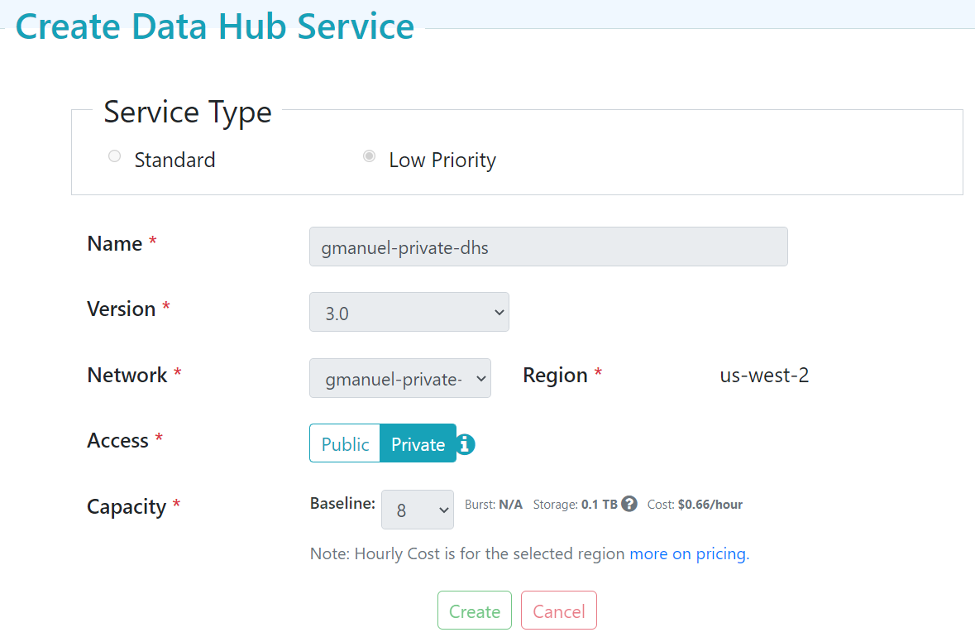
Figure 11: Create Data Hub Service
Clicking on “Create” will spawn the MarkLogic VPC as described in Data Hub Service Architectural Overview. This can take around ten minutes or so. You can hit the “refresh” icon on the upper left to get updates periodically.

Figure 12: Successful DHS Provisioning
Configure Routing
At this point, our “Customer VPC” and “Service VPC” are up and running. We have our peering role set up to allow communication between these two VPCs. But they do not know how to find each other. We need to configure routing tables to allow our “Customer VPC” to know the IP addresses of our “Service VPC”. Learn more about VPC Routing with these resources: Updating Your Route Tables for a VPC Peering Connection and Route Tables.
- Go to your Amazon Console and look for “CloudFormation” under “Management Tools”.
- Create a new stack by specifying an Amazon S3 template URL. Note that Private and Public Route Table ID come from the output of our Customer VPC CloudFormation stack, and Private and Public Subnet CIDRs and Peering Connection ID come from the generated MarkLogic Network created in the previous section.
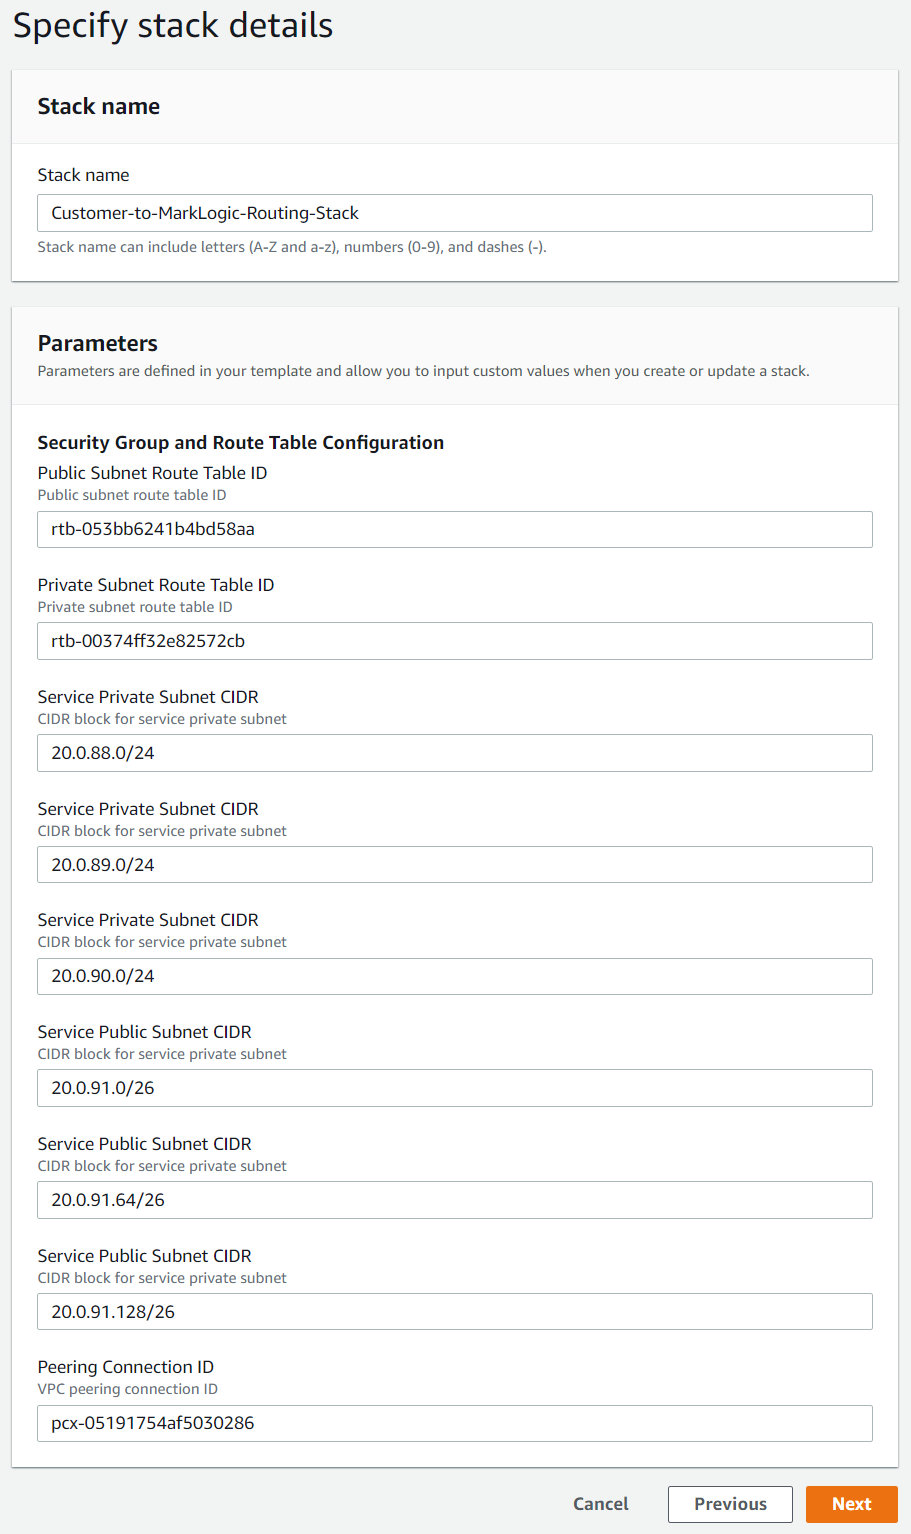
- This can take a while to complete, but you should eventually have something like the following at the end:
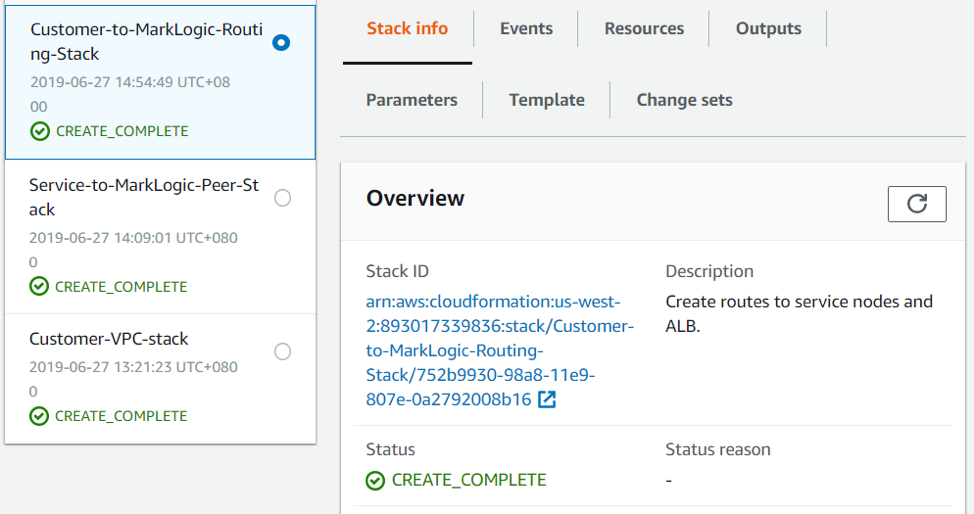
You can now access your DHS instance from or through your bastion server. Additional ssh user accounts will be needed to map to our developers that would connect to/tunnel through the bastion server to deploy the modules and other MarkLogic configuration. Note that these ssh user accounts are different from the Cloud Service accounts, AWS accounts and DHS accounts. Please do not share the ec2-user certificate to your peers.
Optional: Tunnel Setup
Recall how we created the “Customer VPC” and bastion server in the Create Customer VPC section. If we stop here, the only way to access the data hub we just set up is via the bastion server. This is because the provisioned MarkLogic cluster can only be accessed via the load balancers, which can only be accessed via the “Customer VPC”, which can only be accessed via the bastion server.
However, if you prefer to work directly from your local environment using your own browsers to access the Data Hub Service endpoints, then you will need to set up tunneling. To load our modules via gradle or to push data via MLCP or DMSDK, we either execute them at the bastion server, or locally through a tunnel setup. Here, we walk through tunneling setup.
Windows using PuTTY
- Convert your certificate file generated in step #4 of the Create Customer VPC section of this guide into a public/private key pair that PuTTY understands. There are several online documentations on how to proceed with this. Typical choice is to use PuTTYgen.exe.
- For Host Name, supply your Bastion IP address. This is the BastionHostIP from step #11 of the Create Customer VPC section of this guide. In this guide, it would be 54.191.91.126
- Under Connection >> Data, specify ec2-user as “Auto-login username”.
- Under Connection >> SSH >> Auth, click on browse to pick up the converted private key generated on step 1 above.
- Under Connection >> SSH >> Tunnels, add the following entries:
Source Port Destination 8002 <Manage Server>:8002 8004 <Manage Server>:8004 8005 <Manage Server>:8005 8010 <Manage Server>:8010 8011 <Manage Server>:8011 8013 <Manage Server>:8013 - Under session, name and save the session for future re-use.
Mac / Linux using SSH
- Click on “Action”, then on SSH Tunneling Script as shown below:
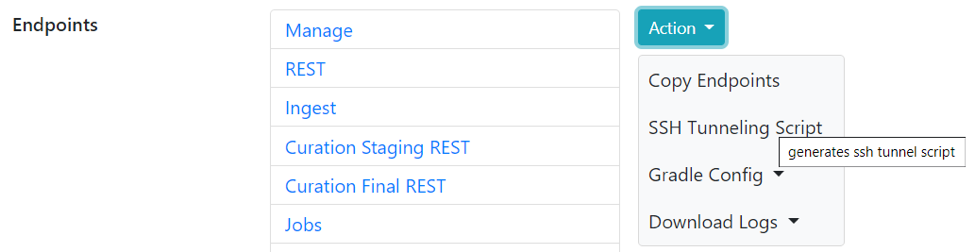
- Click on the “copy” icon to copy the contents to your clipboard for later use.
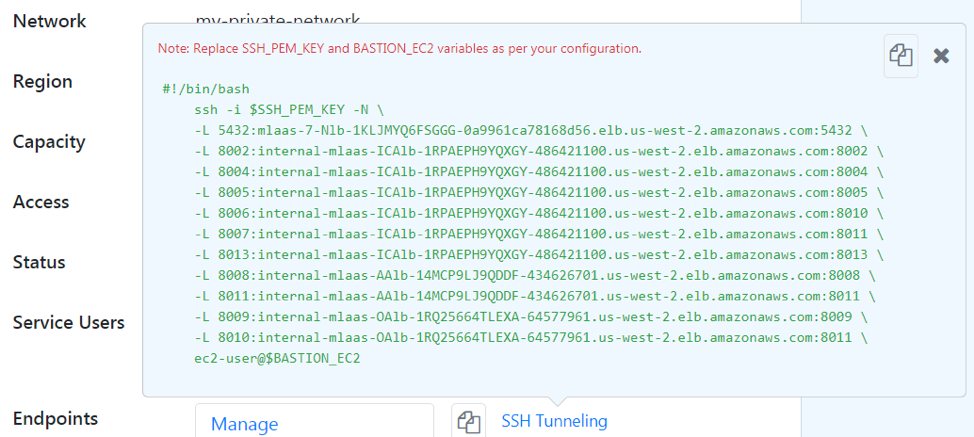
- Replace $SSH_PEM_KEY with
/path/to/my-us-west-2-key-pair.pem(certificate file generated in step #4 of the Create Customer VPC section). - Replace BASTION_EC2 with the IP address of your Bastion server. You may refer to step #11 of the Create Customer VPC section.
You could run the text directly or save it to a file and run using sh /path/to/file.txt.
Developers with existing installation of MarkLogic will notice the potential conflict with use of port 8002. To avoid the conflict, use another port number for the tunnel or change the “Manage” port in your local MarkLogic installation. The rest of this guide assumes that 8002 will be used by our tunnel.
You should now be able to access the Configuration Manager using localhost:8002 as shown below:
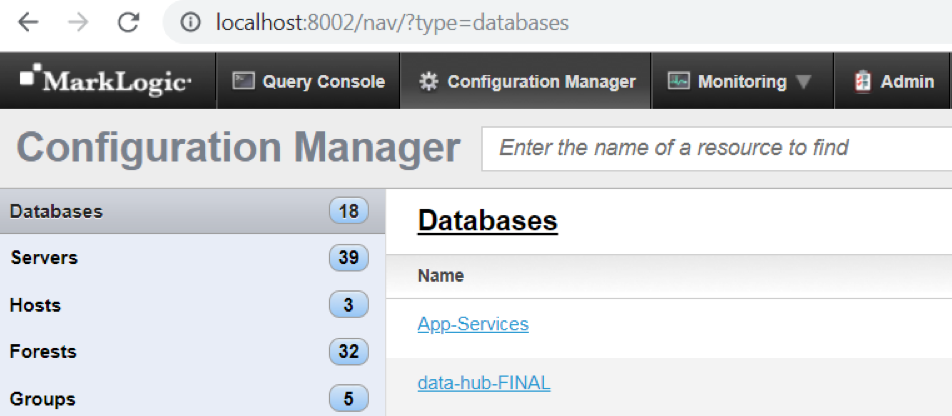
Do note that the endpoints are now accessible using HTTPS, unlike your public network whose endpoints are accessible on HTTP.
Please refer to the previous installment regarding deployment instructions of your data hub application.
Appendix: Resource Checklist
This table can be used to keep track of what we need for each stage of configuration. This is particularly useful for the System Administrator, given the number of actions to be undertaken.
| Field | Requires | Example Value | Your Value |
| AWS Account | Email address
Billing Information |
||
| AWS Account ID | 893017339836 | ||
| key-pair-name | AWS Account | my-us-west-2-key-pair | |
| AWS Certificate | AWS Account | my-dhs-key-pair.pem | |
| VPC CIDR | 10.0.0.0/16 | ||
| VPC Public and Private Subnet CIDRs | 10.0.0.0/23
10.0.96.0/23 |
||
| VPC ID | VPC CIDR
VPC Public and Private Subnet CIDRs key-pair-name |
vpc-0f23c32843d97f2fb | |
| Bastion Host IP | 54.191.91.126 | ||
| Public Route Table ID | rtb-034d205a3c9a8fcc7 | ||
| Private Route Table ID | rtb-0ff979af79d8d874b | ||
| MarkLogic Service ID | MarkLogic Cloud Services subscription in AWS Marketplace
MarkLogic Cloud Service Page signup |
092937385570 | |
| RoleARN | VPC ID
MarkLogic Service ID |
arn:aws:iam::893017339836:role/Service-to-MarkLogic-Peer-Stack-peerRole-D9A1WHFFT1OK | |
| Peering Connection ID | VPC ID
AWS Account ID Peer Role ARN VPC Public and Private Subnet CIDRs Region |
pcx-0afc675504ff09d37 |