Microsoft Azure accelerates a business’s ability to establish and maintain its internet presence by managing hardware infrastructure. This removes the need for companies to manage procurement, maintenance, monitoring, and replacement/upgrade of hardware. Now system administrators are tasked with monitoring these Virtual Machines to guarantee availability, scaling, routing optimization, load balancing, software upgrades, and security patches. The MarkLogic Data Hub Service makes systems administration in the cloud even easier.
Data Hub Service is a fully-automated cloud service to integrate data from silos. Delivered as a cloud service, it provides on-demand capacity, auto-scaling, automated database operations, and proven enterprise data security. As a result, agile teams can immediately start delivering business value by integrating and curating data for both operational and analytical use.
This tutorial gets users new to Azure up and running quickly by focusing on the specific components you need to get started. Further reading is recommended to fully understand all the technologies involved.
Data Hub Service Architectural Overview
With the Data Hub Service on Azure, MarkLogic is hosted in the cloud via Virtual Machines inside a Virtual Network. The diagram below provides an overview of the server and network resources MarkLogic will manage for you:
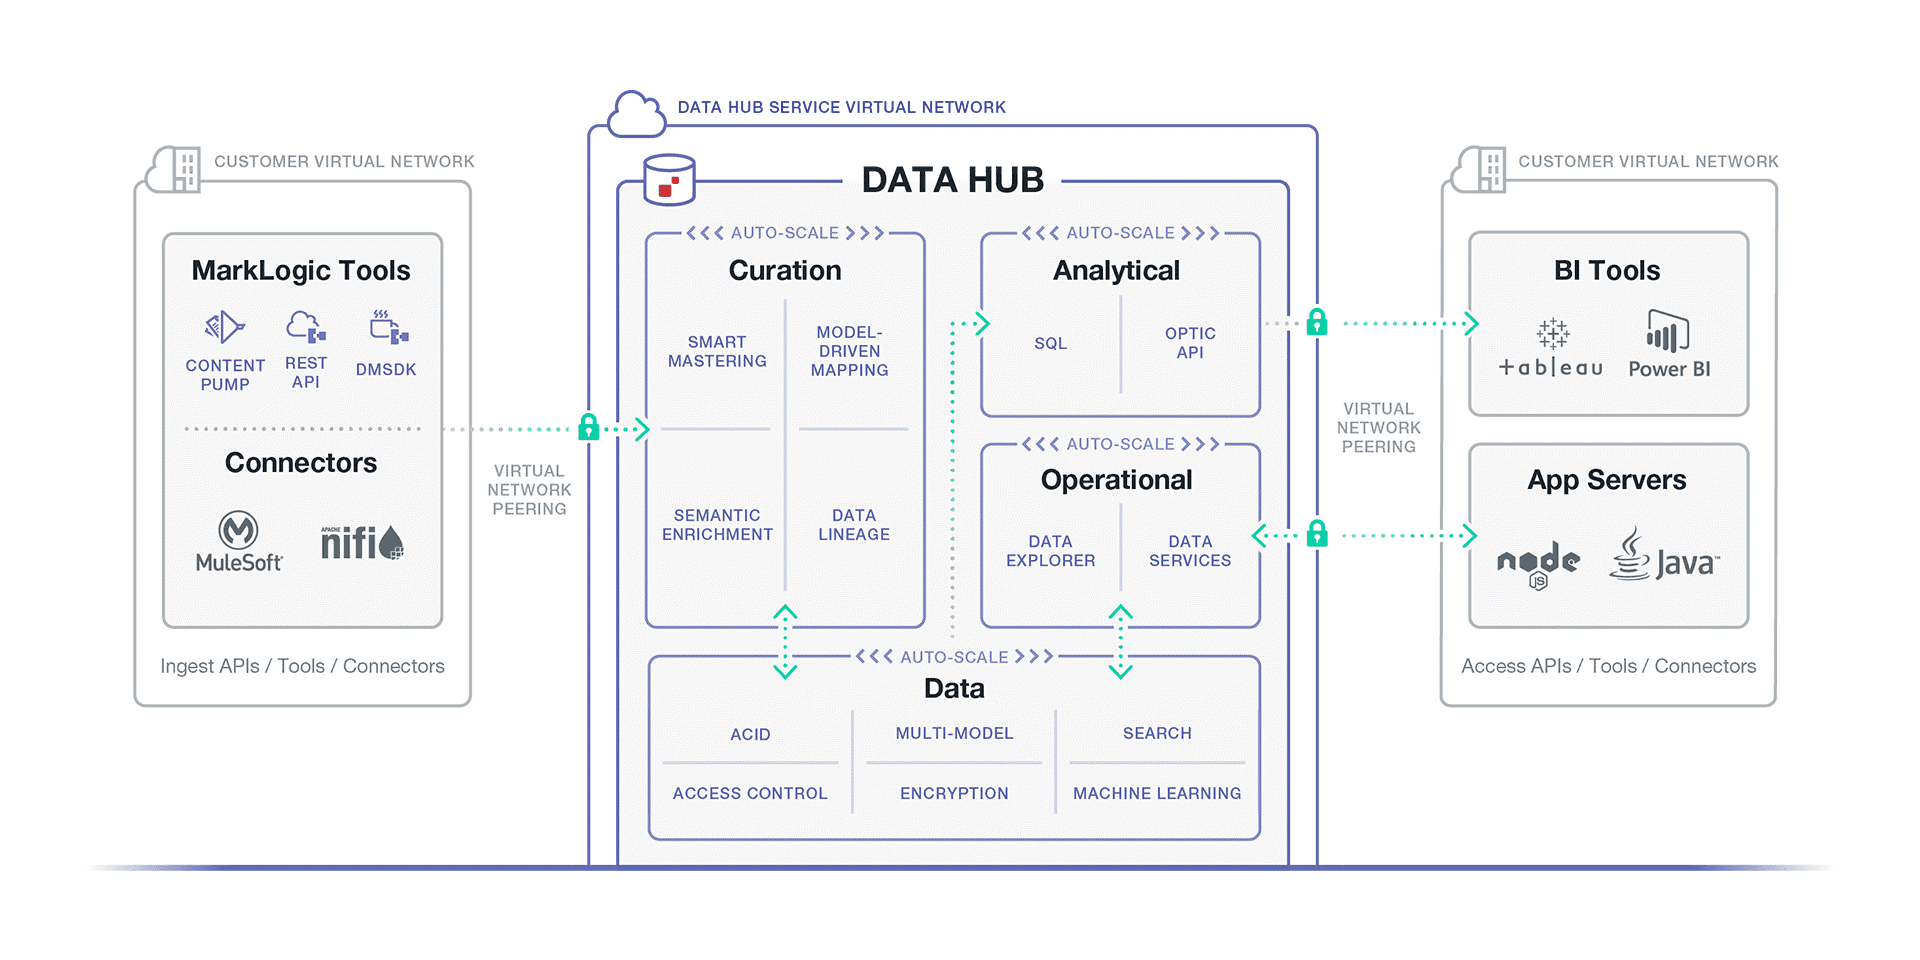
Figure 1: Overview of server and network resources managed by MarkLogic. A more detailed architectural diagram is available in the MarkLogic Data Hub Service Documentation.
An Azure Virtual Network (VNet) is a private network of Azure resources, e.g. Virtual Machines (VMs), that are isolated from all other virtual networks. This allows higher control on access to VMs inside, reduces the risk of unauthorized communication to and from outside the network, and improves communication between VMs by removing the need to traverse the wider internet to talk to the VMs sitting nearby. Azure’s documentation provides more information about Virtual Networks.
This network instance employs auto-scaling configurations to automatically increase and decrease the number of resources as usage spikes and drops, freeing up a lot of concerns for the client. To allow smooth communication between the ever changing numbers of MarkLogic servers, a load balancer sits in front to coordinate with all incoming transactions. This VNet can be configured as something publicly accessible; alternatively, a private VNet requires peering to establish a connection with another VNet.
For the purpose of this part, we will focus on the publicly accessible instance of Data Hub Service. If you are interested in learning more about a private Data Hub Service instance, visit Setting Up MarkLogic Data Hub Service with a Private VNet.
Sign up for Data Hub Service on Azure
To sign up for Data Hub Service on Azure, send a request to your MarkLogic representative or contact us. Our team will walk you through what you need to get set up.
Azure Sign Up
You will need to create an Azure account before creating a MarkLogic Cloud Service account. If you have already signed up for the accounts below, you may skip this section.
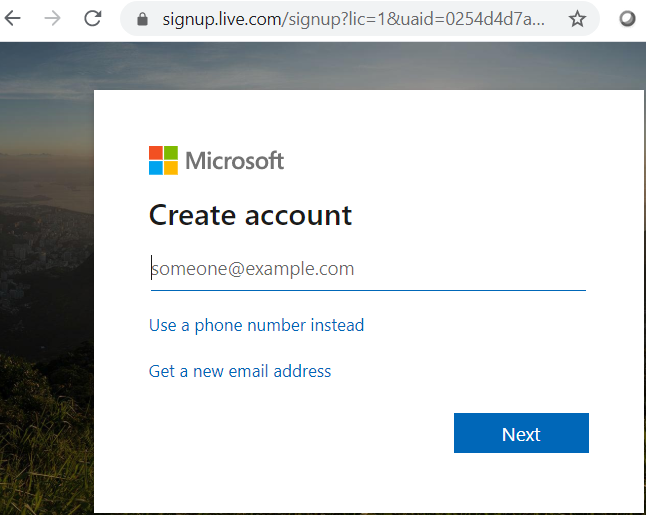
Creating an Azure account will start you at the screen below. Complete the process to create an Azure account, which first takes you to create a Live.com account.
Proceed in registering the details required. Make sure to complete the registration, including your payment method and verification of your contact number. If successful, you end up in the Azure portal viewing your Azure services:
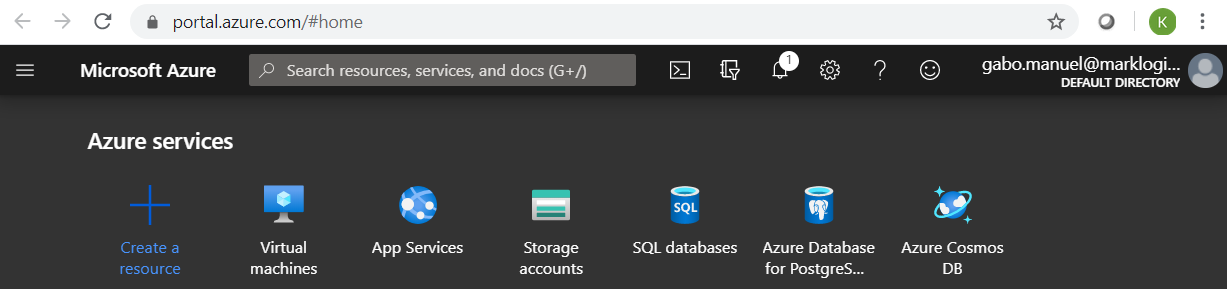
Figure 2: Azure Portal services will display after successful account creation
Create Network Configuration
A public cluster can be easily set up and is recommended for people trying to get familiar with Data Hub Service.
- Go to the MarkLogic Cloud Services (Azure) homepage and click on Network in the top navigation.

- Click on the “Add Network” button.
- Supply the “Name” and preferred “Region.” Do NOT check the peering option.
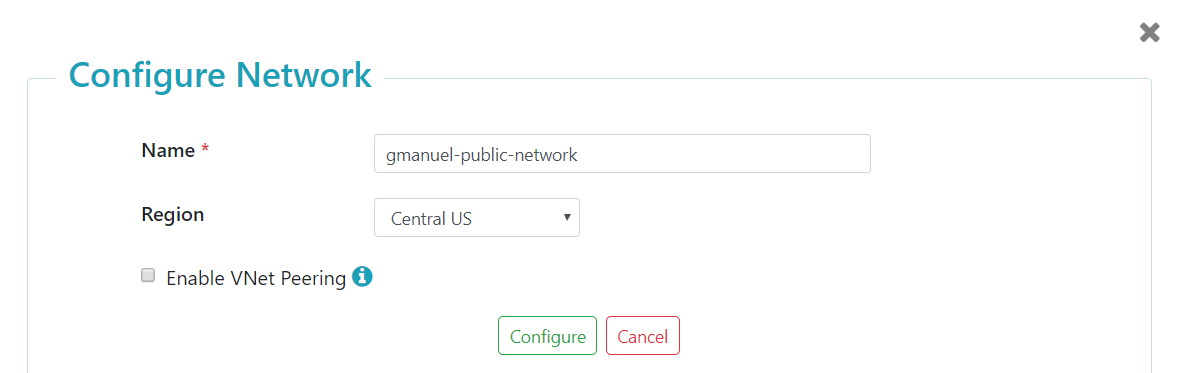
- Click on the “Configure” button.
- Wait for the provisioning to complete. Make sure to click the refresh icon every so often.
You should end up with a NETWORK_CREATED status, like the following:

Figure 3: Network created confirmation screen
Create the MarkLogic Data Hub Service Instance
On the MarkLogic Cloud Services (Azure) homepage, click on the “+ Data Hub Service” tab and supply the following information:
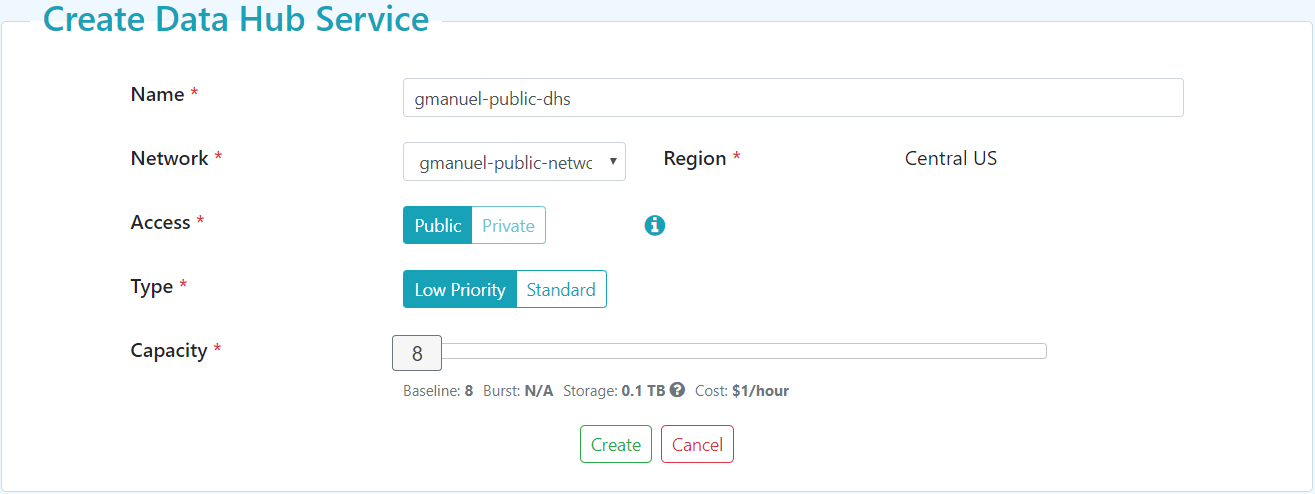
Figure 4: “Create Data Hub Service” interface, with Low Priority type and Public access selected
“Low Priority” type will have the least amount of charges, but also the least amount of resources. This is recommended for the purposes of exploration and POC’s. This type of service will still have all the other features of DHS except the auto-scaling of resources and high-availability.
“Standard” type, on the other hand, will have auto-scaling in effect. Note that the cost adjusts depending on the capacity you specify. The higher the capacity value, the higher the hourly cost. For the purposes of this tutorial, we will use the “Low Priority” type of service at the lowest capacity settings.
“Private” access is only applicable to networks that have configured “Peering” information. We discuss details of the “Private” network in Setting Up MarkLogic Data Hub Service with a Private VNet.
Clicking on “Create” will spawn the MarkLogic VNet as described in the Data Hub Service Architectural Overview. This can take a while, around ten minutes or so. You can hit the “refresh” icon on the upper left to get updates every now and then until you get something like the following:

Clicking on the service name link will take you to the Data Hub Service details page:
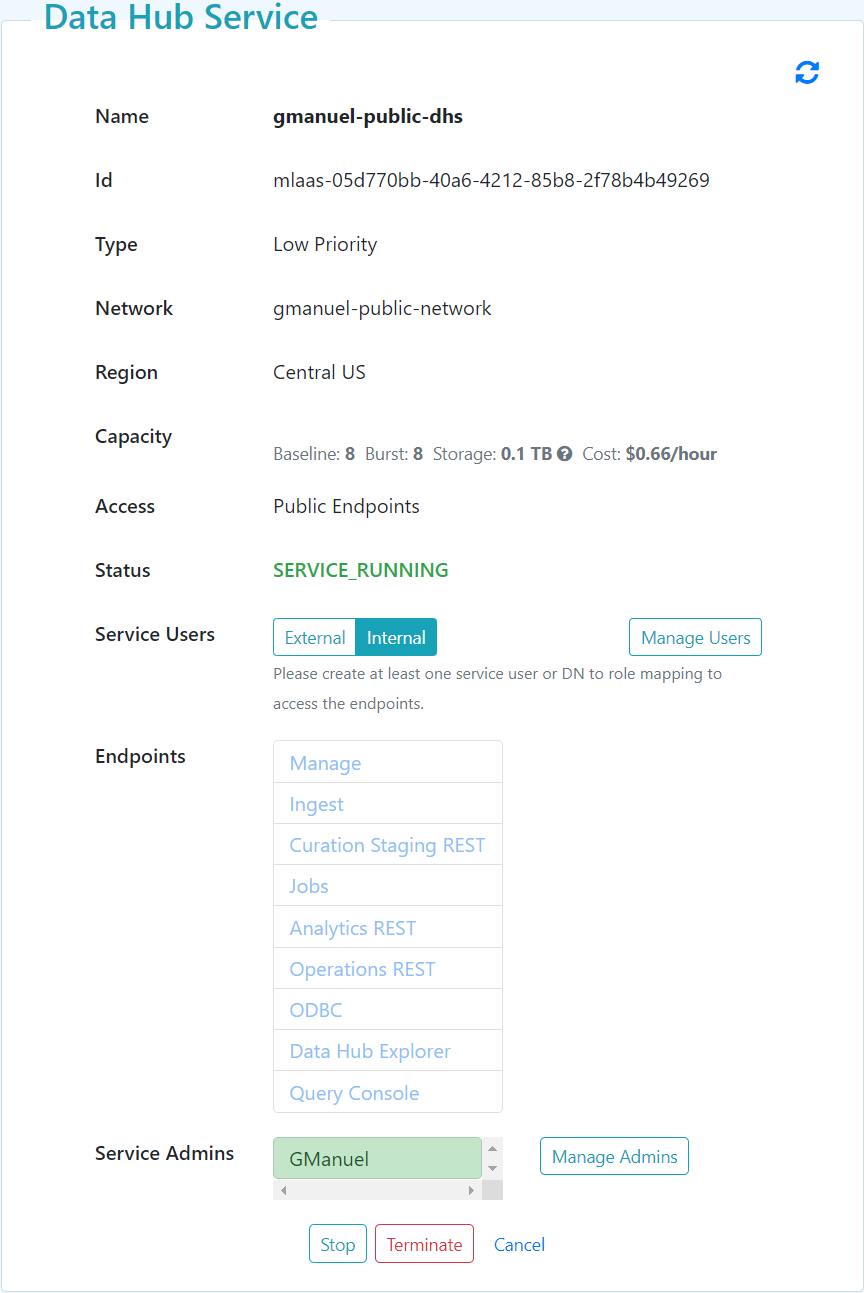
Figure 5: Data Hub Service details
Manage MarkLogic Data Hub Service Security
The links under “Endpoints” are disabled until users are created; they are listed on a dropdown below “External”. For the purposes of this tutorial, we would be relying on “Internal” which translates to users being defined within the MarkLogic instance. Click on “Internal” for “Service Users”, then click on “Manage Users” to start adding users. On the resulting page, click on the “Add User” button to add users with specific roles.
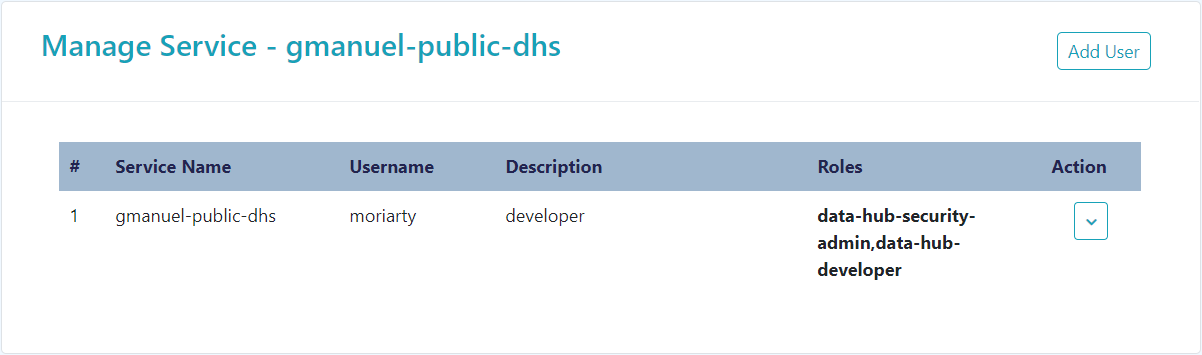
Figure 6: Users and roles for the Data Hub Service
Note that the users created in Figure 6 above will not have SSH access to your servers. These users are MarkLogic accounts created to connect to the endpoints. These roles are described as follows:
| Role | Can do… |
| data-hub-admin | An overall admin of your Data Hub Service instance that can deploy modules, update indexes, and clear all databases involved. |
| data-hub-developer | Can load modules into MarkLogic modules database, load TDE templates, and update indexes. Can view documents, job traces, and history. Can NOT clear any database.
Basically, your gradle task executor. |
| data-hub-security-admin | Can only deploy custom roles and update user assignments. Note that these custom roles can only include roles already assigned to the user. |
| data-hub-operator | A subset of developer role that is only capable of running your flows and viewing your documents. |
| data-hub-monitor | Can only view job traces and history. Able to use the monitoring tools and the REST API. |
| data-hub-explorer-architect | Specific to the use of Data Hub Explorer, this role allows the user to see the entities and their properties. Can NOT browse documents. |
| pii-reader | Able to view document element/properties flagged as PII in the entity definition. |
| odbcUser | Able to connect to the service using an ODBC client. |
| More information about “Service Roles” are available in the docs. | |
The following table details the available endpoints provided by the MarkLogic Data Hub Service:
| Endpoints | Details | Description |
| Manage | Group: Curation
Port: 8003 Content Database: App-Services |
Port to be used when loading modules, updating indexes, and uploading your TDE templates.
You may access ‘/manage/LATEST’ directly to see your list of resources. |
| Ingest | Group: Curation
Port: 8005 Content Database: data-hub-STAGING |
XDBC App server to be used by MLCP. |
| Curation Staging REST | Group: Curation
Port: 8010 Content Database: data-hub-STAGING |
Port to be used when running your ingest and harmonization flows.
Supports MarkLogic’s built in REST API. This allows you to confirm what got loaded to your STAGING database. You need to access /v1/search directly since the default landing page is not supported. |
| Jobs | Group: Curation
Port: 8013 Content Database: data-hub-JOBS |
This port allows the user to view jobs and traces. |
| Analytics REST | Group: Analytics
Port: 8012 Content Database: data-hub-FINAL |
Supports MarkLogic’s built in REST API. This allows you to confirm what got loaded to your FINAL database. |
| Operations REST | Group: Operations
Port: 8011 Content Database: data-hub-FINAL |
Supports MarkLogic’s built in REST API. This allows you to confirm what got loaded to your FINAL database.
The goal is to separate operations-related transactions from report-related functions |
| ODBC | Group: Analytics
Port: 5432 Content Database: data-hub-FINAL |
Port to be used by your BI tools. |
| Data Hub Explorer | Group: Analytics
Port: 8020 Content Database: data-hub-FINAL |
Port to be used when using Data Hub Explorer app |
| Query Console | Group: Curation
Port: 8003 Content Database: App-Services |
Requires the “/qconsole” path to be specified.
Note that this is only available for “Low Priority” |
Figure 8: Available Data Hub Service endpoints (please note that “Query Console” is only applicable to a “Low Priority” type of Data Hub Service instance)
The concept of “group” only applies to “Standard” type of Data Hub Service instances. This affects the auto-scaling configuration and behavior.
Note that the “Service Admins” do not have access to the above endpoints; rather, they are referred to as “portal users” that are allowed to access the Data Hub Service portal. Conversely, “Service users” or endpoint users configured with the roles above cannot access the portal.
Developer Access to the Data Hub Service
The following sections will provide some guidelines on what needs to be done and what can be done to load your modules to the Data Hub Service instance. Note that you cannot use the Data Hub Developer Quickstart to deploy your project to your Data Hub Service instance. You may use Hub Central to deploy your project instead. If you have an existing project that uses Quick Start, you must convert artifacts to the Hub Central format to use Hub Central.
Confirm Initial Configuration
To confirm the availability of the initial configuration, load the Configuration Manager application at the “Manage” endpoint. If you are familiar with MarkLogic Server, this is the equivalent of the standard “Manage” app server page. When prompted for credentials, use the configured user account with at least “data-hub-developer” role to access this page. You would have to type-in ‘/manage/LATEST’ to see something similar to this:

Project configuration
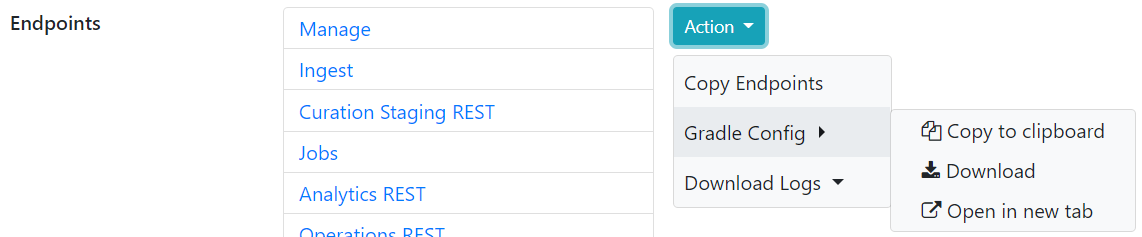
Gradle configuration for your DataHub project can be downloaded by doing the following steps:
- Click on the “Action” button
- Hover over “Gradle Config”
- Click on “Download” and save to your project folder
Gradle tasks
The table below lists the Gradle tasks available. These tasks are for a Data Hub Framework project, not your vanilla ml-gradle project.
| Task | Purpose |
hubInstall |
Install DHF modules. |
mlLoadModules |
Deploy your code custom code beyond the default code of DHF |
mlUpdateIndexes |
Deploy your indexes as defined in <project-root>/src/hub-internal-config/databases/your-db.json |
mlDeployViewSchemas |
Deploy your TDE templates as defined in <project-root>/src/hub-internal-config/schemas/tde/your-template.json |
hubRunFlow |
Run your harmonization flow. |
hubDeployAsSecurityAdmin |
Deploy custom roles. |
hubDeployAsDeveloper |
Deploy modules, entity definitions, tasks, triggers, etc. |
hubDeploy |
Deploy/publish your entire project into a DHS instance. |
Figure 9: Gradle tasks and purposes
Other ml-gradle tasks are also supported, e.g. mlLoadModules, mlUpdateIndexes, etc. The ‘mlDeploy’ task is unavailable for MarkLogic Data Hub Service users since users do not have the full admin role. More Data Hub specific tasks are listed in the Data Hub documentation.
Access for Data Services
“Analytics REST” (<ANALYTICS>:8012) and “Operations REST” (<OPERATIONS>:8011) support both the built-in MarkLogic REST API and the Data Services First (DSF) endpoints. DSF modules would have to reside in a ‘ds’ folder as noted in the docs. Conversely, these endpoints would have to be accessed with a ‘/ds’ path prefix.
If you run into issues using MarkLogic Data Hub Service, contact Support. MarkLogic engineers and enthusiasts are also active in Stack Overflow, just tag your questions as ‘marklogic’.
Ready for more? If you are interested in learning more about a private Data Hub Service instance, visit Setting Up MarkLogic Data Hub Service with a Private VNet.