If you are new to Azure and Virtual Private Networks (VPN), we suggest you start with the Getting Started with MarkLogic Data Hub Service on Azure tutorial. This tutorial assumes you are comfortable working with Azure and its products like Virtual Networks (VNets), Virtual Machines (VMs), etc.
When hosting your application in an Azure Virtual Network, having a private MarkLogic VNet with peering configured is recommended. This tutorial covers configuring a private MarkLogic Data Hub Service VNet, along with configuring the peering required to allow your Customer VNet to communicate with the provisioned MarkLogic Data Hub Service VNet.
You should have already created your Azure and MarkLogic cloud service accounts, as described in the previous installment.
Data Hub Service Architectural Overview
Here are the server and network resources that we want to establish:
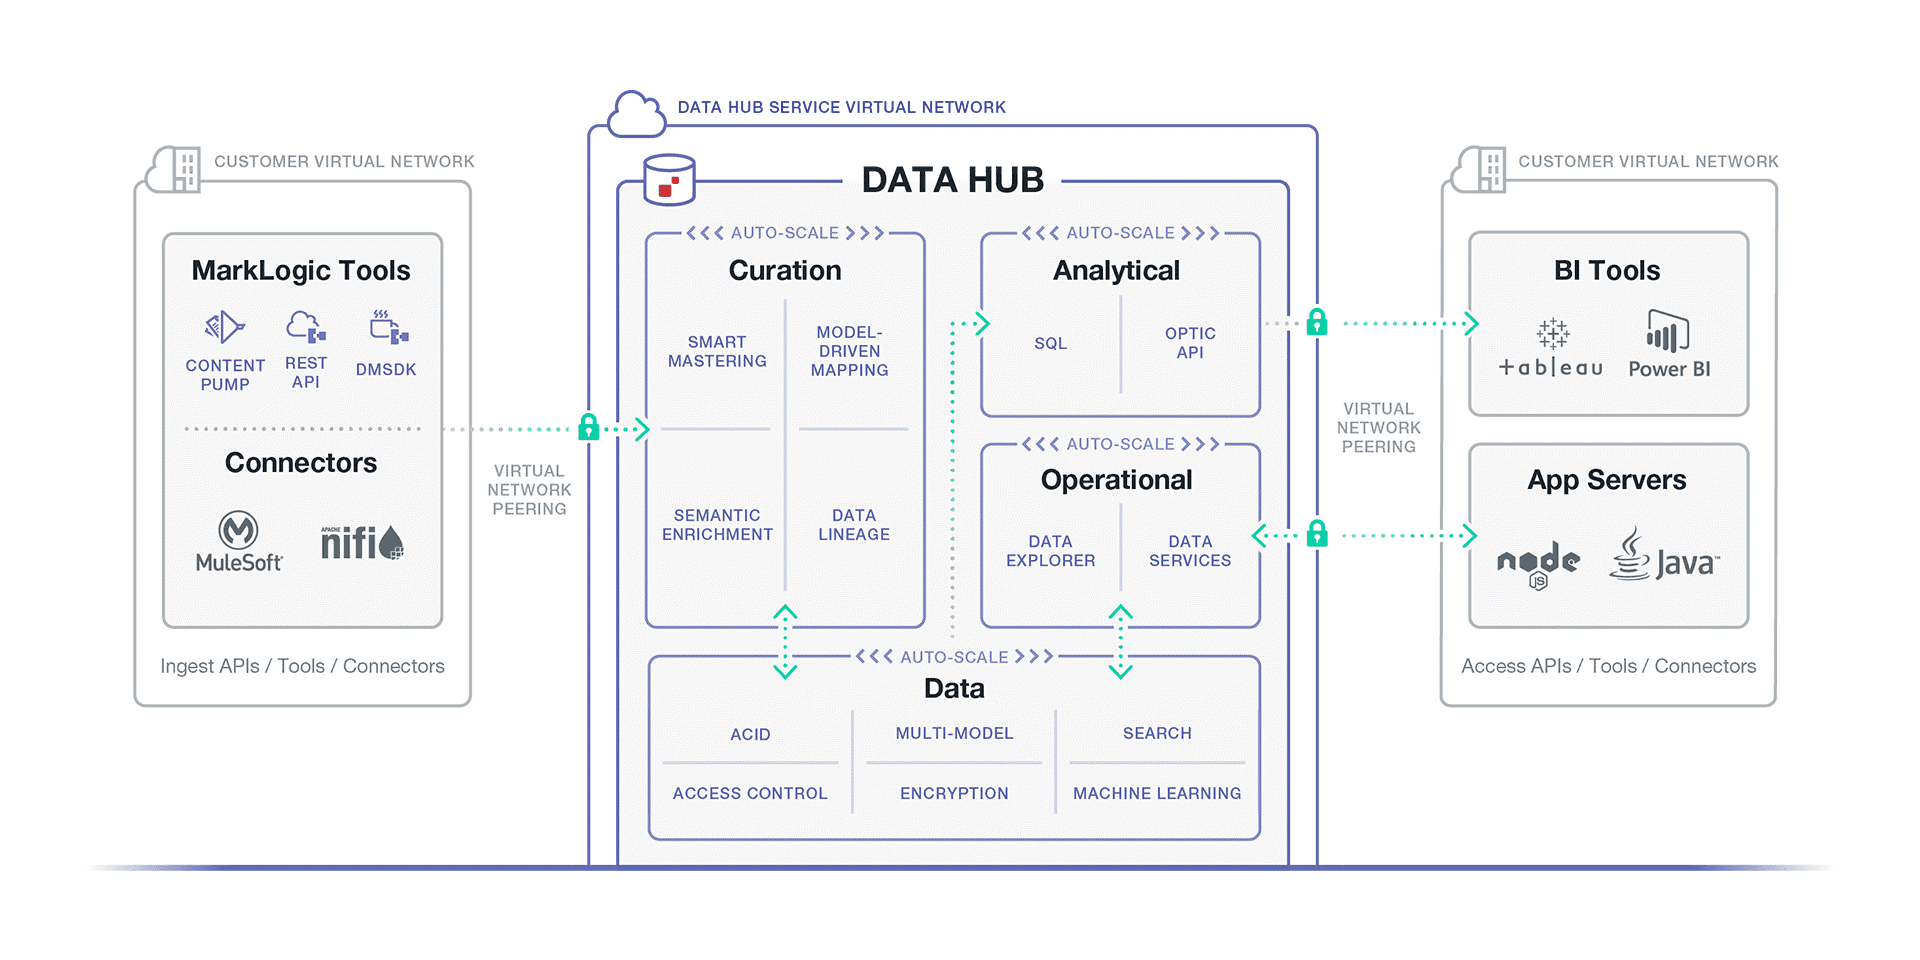
Figure 1: Server and network resources to be established
The “Customer VNet” will be managed by the customer, and the “Service VNet” is managed by MarkLogic. Systems accessing the data hub like front-end GUI, background applications, and LDAP servers, can be hosted in VMs in the Customer VNet. Since “Service VNet” is private, “VNet Peering” is required to allow communication between the “Customer VNet” and the “Service VNet”.
The Azure documentation has more information about Vnets and VNet Peering.
Refer to the Resource Checklist in the Appendix to help track the various pieces of information we will generate and use.
Create Customer VNet
The MarkLogic Data Hub Service requires the Customer VNet to be in the same region as the Service VNet. Accordingly, please take note of the supported regions for the MarkLogic Data Hub Service:
- West US 2
- Central US
- East US
- North Europe
If your company has its own policies for establishing VNets, take note of the following information:
| Customer VNet Resource ID | The unique ID of our virtual network |
| Customer VNet Address Space |
This is the Network CIDR for your virtual network |
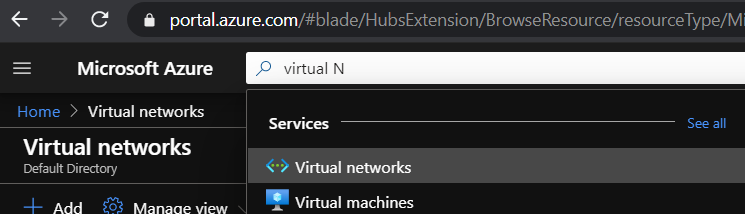
Otherwise, we must create a Customer VNet. From your Azure home page, look for “Virtual Networks” (shown below) and click on “+ Add” to create a new VNet.
The following information is required to create a VNet:
| Subscription | This is a billing group associated with your account. You may create your own subscription by looking for “subscription” and clicking on “+ Add” to create your own. |
| Resource Group | A means to group resources together to easily identify the during billing. |
| Name | The name of your Virtual Network |
| Region | The region your VNet will reside in. Note that your VNet must be in the same region as your Data Hub Service VNet. |
As seen in this screenshot:
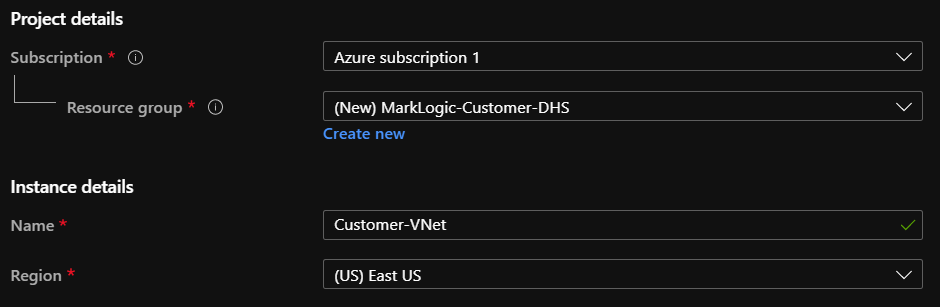
Figure 2: Details provided to create a VNet
Then click on “Next: IP Address”; at this point, you can update the rest of the settings as needed, but for the purposes of this tutorial, we will use the default settings provided by Azure. Note down the “IPv4 Address Space”, as we will be using it later.

Figure 3: Note the “address space” during Vnet Creation
On the following Security step, you have an opportunity to configure your Bastion host to secure the rest of your VMs for this VNet. Note that you cannot access an Azure Bastion other than via the Azure portal, i.e. you cannot use SSH to tunnel through an Azure Bastion host. For the purpose of this tutorial, we would be using a “JumpBox” instead.
Continue through Tags (per your organization’s requirements) until you reach the “Review + Create” section. Once you see the “Validation passed” notification, click on “Create”. Creation may take a while.
You can also find the “address space” on the overview page of your VNet:

Figure 4: VNet overview also contains “address space” information
In addition, note your VNet’s “Resource ID” from the “properties” section:

Figure 5: VNet Properties, which contains the Resource ID
Create your Jumpbox
At this point you have a VNet without a Virtual Machine. In order to secure the VNet, we can enable only one VM to have connectivity over the internet; this is called the jumpbox or jump server. By using this VM, you can connect to other Azure VM’s using dynamic IP while preventing all Azure VMs to be exposed to the public. All VMs other than the jumpbox should have port 22 (for SSH) blocked off. Let’s create this jumpbox.
From your Azure home page, look for “Virtual Machines” and click on “+ Add” to start the process. As you proceed through the steps, note the following:
- “Region” has to be on the same host as your Data Hub Service VNet
- “Authentication” should use public key
- “Public key” should match a prepared private key. While we do not cover key generation in this tutorial, you may want to start out with certificates, then convert those certificates to public and private key pairs.
- “Public inbound ports” should “allow selected ports”
- “Select inbound ports” should include SSH (port 22)
After clicking “Next: Disks”:
- We choose “Standard HDD” for this tutorial.
After clicking “Next: Networking”, note the following information:
- Virtual Network should use Customer-VNet, which we created above.
- “Public inbound ports” should “allow selected ports”
- “Select inbound ports” should include SSH (port 22)
Proceed through the steps and update settings as necessary. Click on “Create” after you see the “Validation passed” notification. Once created, load the resource page and take note of the Public IP address as shown below:
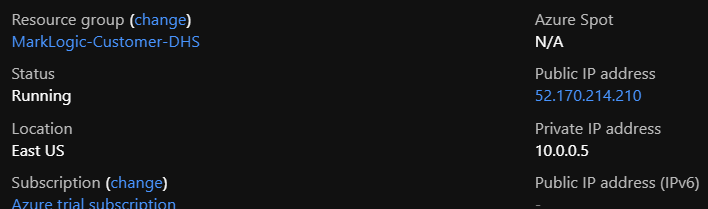
Figure 6: VM resource page, which contains the Public IP address
Create Peered Data Hub Service Network
We now have our customer VNet configured along with the entry point (the jumpbox). You can populate the VNet per your application’s needs following company guidelines on access and security. Before we proceed with creating the peered Data Hub Service network, gather the information we have noted thus far.
In addition, locate your Tenant ID by looking for “Azure Active Directory” from your Azure home page and loading your selected Azure Active Directory.
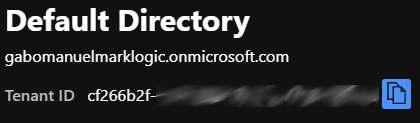
Figure 7: Tenant ID is found in the default active directory display
- Go to the Data Hub Service for Azure portal.
- Click on “Network” in the upper set of tabs
- Click on “Add Network”
- Provide a name for the network
- Be sure to choose the same region as your Customer VNet.
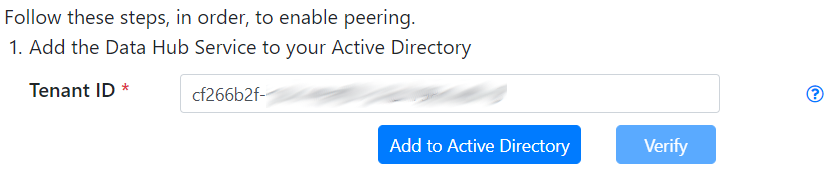
- Supply the “Tenant ID” and click on “Add to Active Directory” as shown below. This will open a new tab that will require you to login.
- Go back to the Data Hub Service for Azure portal after signing in to Azure.
- Click on “Verify”
- Go back to your Azure portal and load your Customer VNet
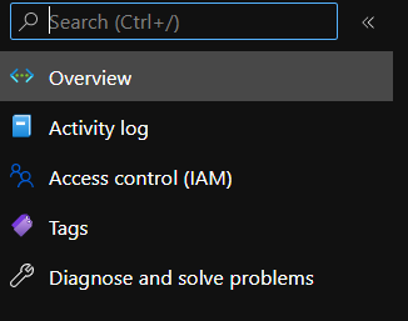
- Click on the “Access Control” menu item as shown below:
- Click on “+ Add”, followed by “Add Role Assignment”
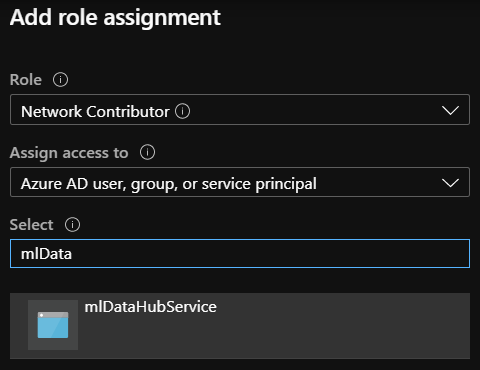
- Choose “Network Contributor” as role and “mlDataHubService” as “Select” (the “Add” button is at the bottom of the screen):
- Go back to the Data Hub Service for Azure portal and check the “I have completed the role assignment” box
- Input the Customer VNet Resource ID as VNet ID
- Provide the Customer VNet Resource Address as VNet CIDR
Your form should look something like this:
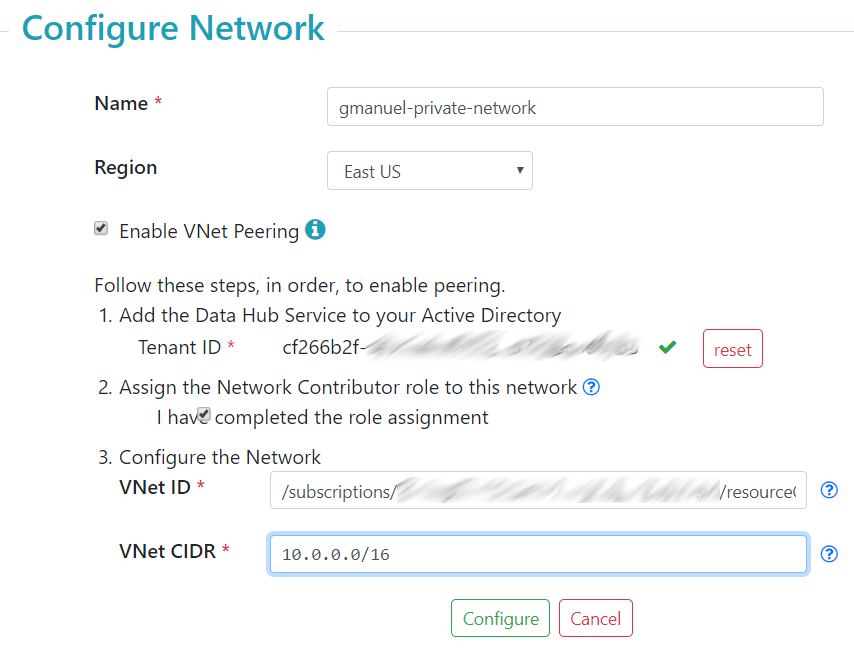
Figure 8: Example form for configuring Data Hub Service Network for private VNet. The “VNet ID” may be case-sensitive when checking the pattern such that the sections: “subscriptions”, “resourceGroups”, “providers”, and “virtualNetworks”, must be in the provided character case
Click on “Configure” to start the process of network creation. This can take a while to provision, but eventually you would end up with an entry like the following:

Take note of the “Peering Connection ID” and the “Network CIDR” above as DHS Network CIDR. We will be using them later.
Create the Data Hub Service Instance
On the MarkLogic Cloud Services Azure homepage, click on the “+ Data Hub Service” tab to create an instance, make sure to select “Private Access,” and supply the following information:

Figure 9: Create Data Hub Service
Clicking on “Create” will spawn the MarkLogic VNet as described in Data Hub Service Architectural Overview. This can take around ten minutes or so. You can hit the “refresh” icon on the upper left to get updates periodically.

Figure 10: Successful DHS Provisioning
Now you can configure your users similar to how we did it for the public Data Hub Service instance.
Set Up Tunneling
The provisioned MarkLogic cluster can only be accessed via the load balancers, which can only be accessed via the “Customer VNet”. In addition, our “Customer VNet” can only be accessed via the jumpbox or via the Azure portal. If you prefer to work directly from your local environment using your own browsers to access the Data Hub Service endpoints, then you will need to set up tunneling. To load our modules via gradle or push data via MLCP or DMSDK, we either execute them on the jumpbox or locally through a tunnel setup. Here, we walk through tunneling setup.
Windows using PuTTY
- For Host Name, supply your jumpbox Public IP address.
- Under Connection >> Data, specify the username you used to create your jumpbox as “Auto-login username”
- Under Connection >> SSH >> Auth, click on browse to pick up the corresponding private key of the public key you used to configure your jumpbox.
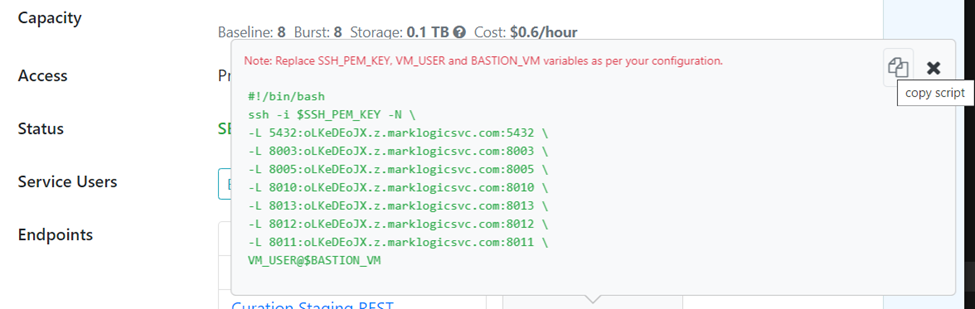
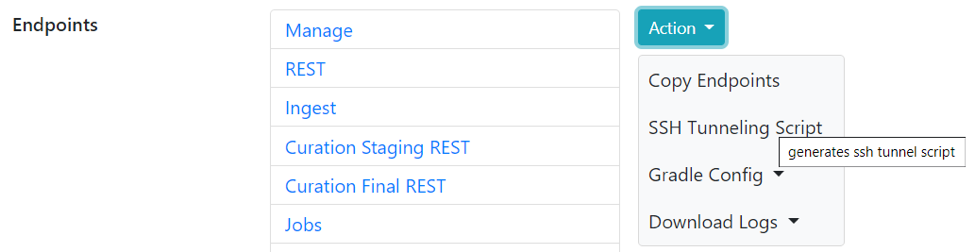
- In your Data Hub Service portal, click on “Action” >> “Tunneling script” and the “copy” icon to copy the script. Paste the contents into an editor like Notepad.
- Under Connection >> SSH >> Tunnels, add the entries that correspond to the above list. Note that the servers would be different in a “standard” Data Hub Service instance; here, we chose “Low Priority”.
- Under session, supply the name under “Saved Session” and click “Save” for future reuse.
- Click “Open” to start tunneling.
Mac / Linux using SSH
- Click on the “SSH Tunneling Script” link in your Data Hub Service page as shown below:
- Click on the “copy” icon and paste the contents into an editor like Notepad.
- Replace $SSH_PEM_KEY with
/path/to/my-cert.pem - Replace VM_USER with the username you used to create your jumpbox.
- Replace BASTION_VM with the your jumpbox Public IP address
You could run the text directly or save it to a file and run using sh /path/to/file.txt.
Developers with existing installation of MarkLogic will notice the potential conflict with use of default Data Hub Service ports like 8010. To avoid the conflict, use another port number for the tunnel or change the port values in your local MarkLogic installation by updating gradle-local.properties.
It is important to note that the endpoints are now running under the HTTPS protocol, unlike the DHS instance with public access that runs on HTTP.
You should now be able to access the manage page using localhost:8003. Please refer to the previous installment regarding deployment instructions of your data hub application.
If you run into issues using MarkLogic Data Hub Service, contact Support. MarkLogic engineers and enthusiasts are also active in Stack Overflow, just tag your questions as ‘marklogic’.
Appendix: Resource Checklist
This table can be used to keep track of what we need for each stage of configuration.
| Field | Requires | Example Value | Your Value |
| Region |
East US | ||
| Azure Tenant ID | cf66b2f-xxxxx | ||
| Customer VNet Resource ID | /subscriptions/xxxx | ||
| Customer VNet IPv4 Address Space | 10.0.0.0/16 | ||
| Jumpbox Public IP Address |
Customer VNet Jumpbox VM |
52.170.214.210 | |
| Peering Connection ID | Customer VNet Resource ID Customer VNet IPv4 Address Space Region Acure Tenant ID |
mlaas-b5a1c3ca… | |
| Data Hub Service Network CIDR | Customer VNet Resource ID Customer VNet IPv4 Address Space Region Acure Tenant ID |
10.100.16.0/22 |