MarkLogic now offers a supported Kafka connector. The content below is outdated in terms of how it instructs a user to use our connector. Please visit the connector documentation for complete information on using the connector.
The Kafka-MarkLogic-Connector can help you stream data from Kafka into a MarkLogic. You can learn how about the advantages and use cases of the tool in Phil Barber’s blog Streaming Data into MarkLogic with the Kafka-MarkLogic Connector.
What we want to do now is build a working example using the tool. This tutorial will walk you through achieving a basic version of this system setup, which includes an AWS instance for MarkLogic, an AWS instance for Kafka, as well as setting up MarkLogic and Kafka.
This can serve as a starting point for creating an operational system that is scalable and has built-in redundancy. Note that you need to have an AWS account, an existing VPC, and gradle installed to proceed with the tutorial.
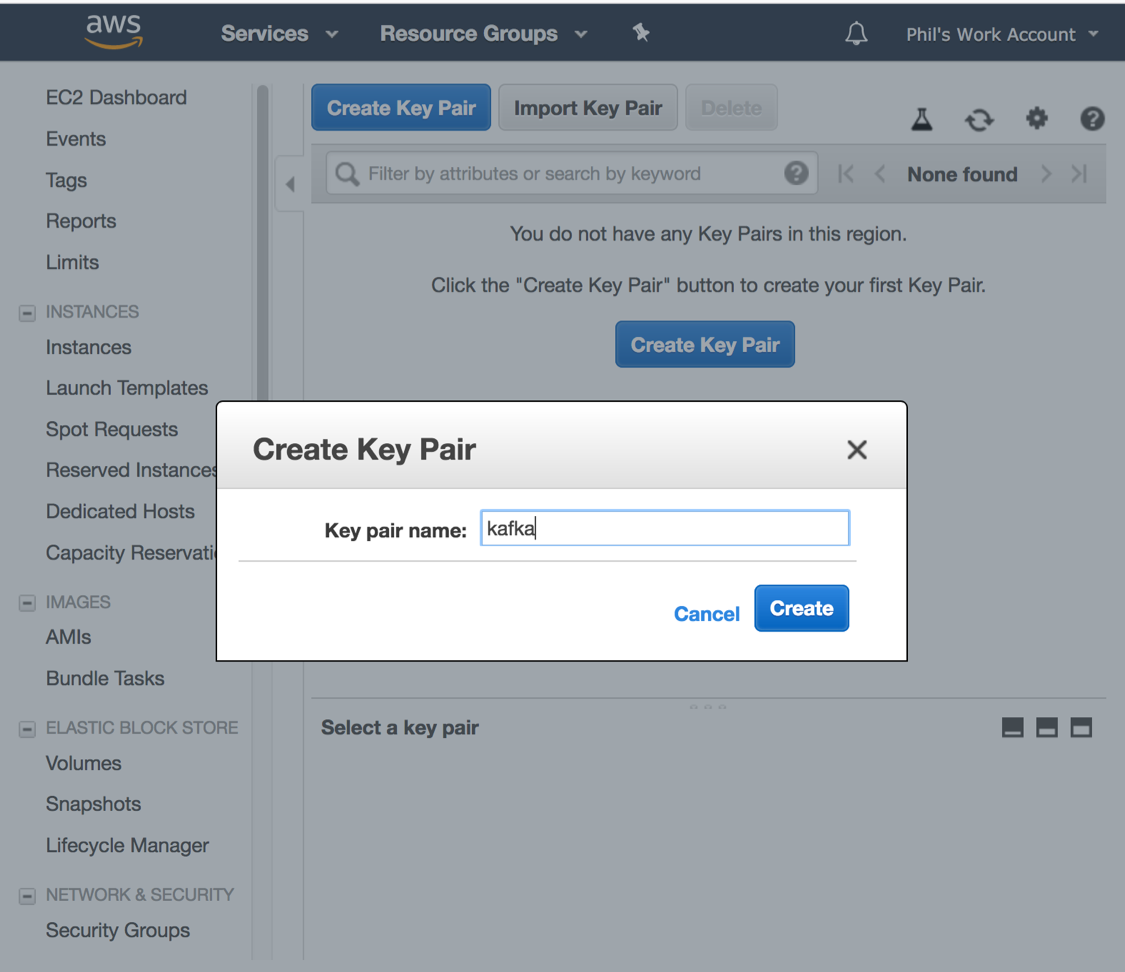
Create a Key Pair for Accessing Systems
In order to access the AWS instances that we will be creating in this tutorial, we first need to create a key pair to login to the instances and encrypt the communication between your local environment and AWS.
- On the EC2 Dashboard for your VPC region, under Network & Security in the left nav bar, click on Key Pairs. The key pair and VPC must be in the same region.
- Click on the “Create Key Pair” button.
- Name the Key Pair and accept the automatic download of the pem file. For our purposes, we will name it and refer to it as “kafka.pem”.
- Store the pem file in some place easy to find.
- If your local operating system is Linux or Mac, change the permissions on the pem file to restrict access to yourself (chmod 600 <filename>.pem)
- If your local operating system is Windows, you need to convert this to private and public key pair using PuTTYgen or a similar tool. You can refer to Getting Started with MarkLogic Data Hub Service on AWS for help.
Create a MarkLogic Instance
- Find MarkLogic Developer 9 in the AWS Marketplace and subscribe:
- Click <Continue to Subscribe>
- Click <Accept Terms>
- Click <Continue to Configuration>
- Click <Continue to Launch>
- Accept most of the default settings.
- Choose an EC2 Instance Type (e.g., t2.xlarge). Note that a t2.xlarge instance would be too small for a production environment, but is sufficient for our purposes.
- Accept default VPC & Subnet settings.
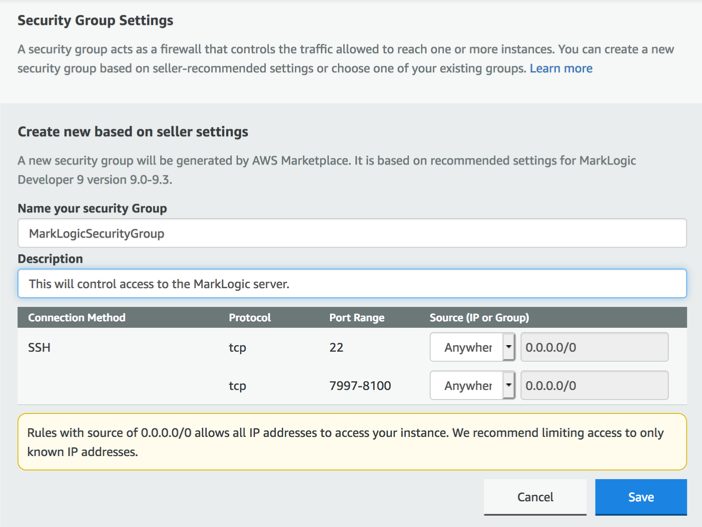
- Under “Security Group Settings,” click “Create New Based on Seller Settings.”
- Name and describe the security group and click “Save.”
- Choose the Key Pair created above.
- Click the “Launch” button.
To access this instance, you need the public DNS. This is available on the EC2 Dashboard from Instances in the left nav bar. Clicking on the instance name will display the instance description, which includes the public DNS. The public DNS is ONLY available when the instance is running and may change when the instance is restarted.
While on the EC2 Dashboard, it is also useful to give the instance a name such as “MarkLogic.”
Create a Kafka Instance
- Find Kafka Certified by Bitnami in the AWS Marketplace and subscribe:
- Click <Continue to Subscribe>
- Click <Accept Terms>
- Click <Continue to Configuration>
- Click <Continue to Launch>
- Choose an EC2 Instance Type (e.g., T2.micro).
- Accepted default VPC & Subnet settings.
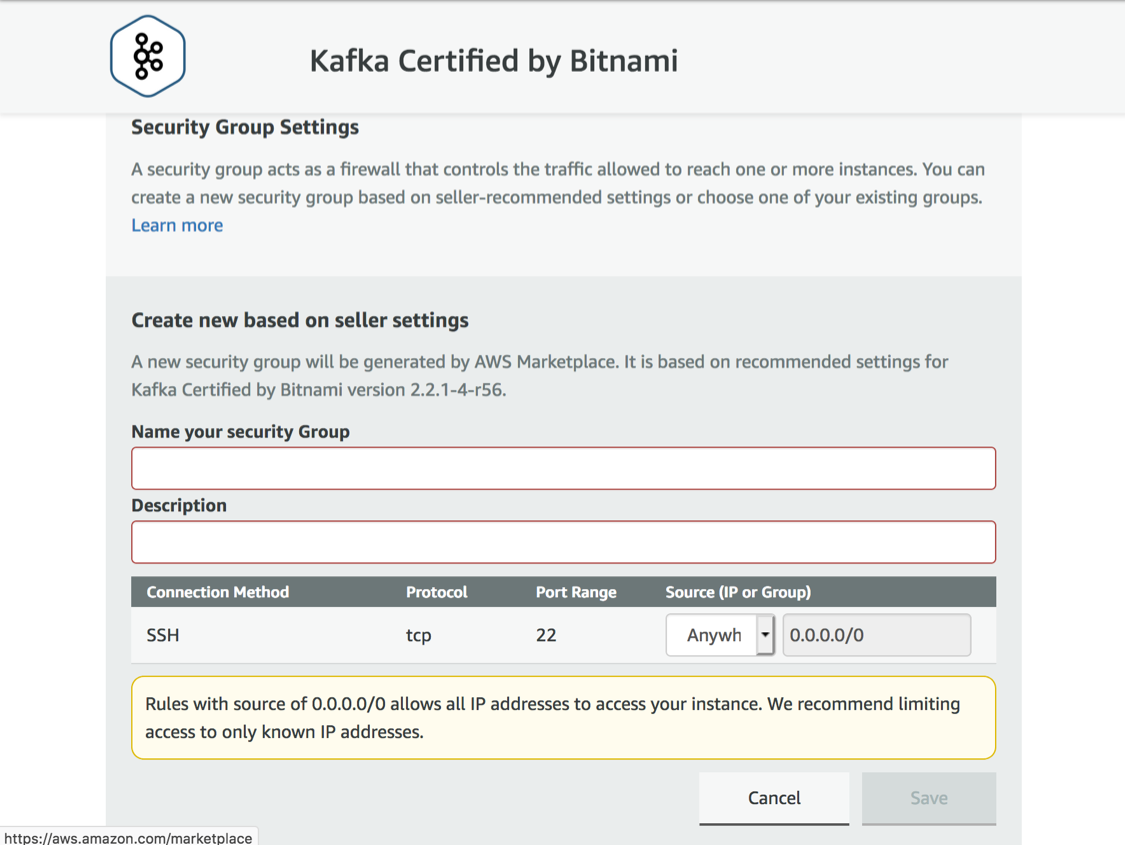
- Under “Security Group Settings,” click “Create New Based on Seller Settings.”
- Name and describe the security group and click Save.
- Choose the Key Pair created above. For security purposes, we recommend that you use a different key pair for each instance in a production environment. To keep it simple, here we use the same key pair.
- Click the “Launch” button.
- Obtain the public DNS for your Kafka instance.
Starting MarkLogic Server on the MarkLogic AWS Instance
- From your local environment, connect to your MarkLogic server via SSH:
ssh -i kafka.pem ec2-user@<ML Server Public DNS> - Create and edit a marklogic.conf file using the following command. Add the line “MARKLOGIC_EC2_HOST=0” to turn off the MarkLogic EC2 detection.
sudo vi /etc/marklogic.conf - Start MarkLogic Server:
sudo /sbin/service MarkLogic start
Initializing MarkLogic Server
- Access the Admin Console by pointing a browser to http://<ML Server Public DNS>:8001.
- When prompted by the need to initialize the server, click <ok>.
- When prompted to join a cluster, click <skip>.
- When prompted for initial admin user, enter security info and click <ok>.
- Enter the username and password for the admin user to log in.
Initializing Kafka on the Kafka AWS Instance
The latest Bitnami Kafka AMI has some significant changes. Because of the new version of the Bitnami Kafka AMI, we need to turn off SASL for this quickstart. After making the change, the Kafka service needs to be restarted.
- From your local environment, connect to your Kafka server via SSH:
ssh -i kafka.pem bitnami@<Kafka Server Public DNS> - Turn off SASL authentication (on lines 28, 36, and 141, change “SASL_PLAINTEXT” to “PLAINTEXT”):
sudo vi /opt/bitnami/kafka/conf/server.properties
sudo /opt/bitnami/ctlscript.sh restart kafka - Create a Kafka topic called “marklogic”:
/opt/bitnami/kafka/bin/kafka-topics.sh --create --zookeeper localhost:2181 --replication-factor 1 --partitions 1 --topic marklogic
Note that in step 3, the hyphens before the options must be double-hyphens. To ensure accuracy, you may want to copy and paste this.
Configure and Build the Kafka-MarkLogic-Connector
Now that we have our environment set up, let’s get started with the Kafka-MarkLogic-Connector.
- Clone the repository.
- Confirm the following property in “/config/marklogic-connect-standalone.properties”. This property tells the connector how to talk to Kafka and zookeeper:
bootstrap.servers=localhost:9092 - Edit /config/marklogic-sink.properties. The topic was created above and tells the connector which topic to subscribe to. The ml.connection.host property tells the connector where MarkLogic is:
topics=marklogic
ml.connection.host=<ML Server Public DNS> - Build the .jar file:
./gradlew jar
Deploy and Start the Kafka-MarkLogic-Connector
In this example, the Kafka-MarkLogic-Connector files will go on the Kafka AWS instance. The Kafka-MarkLogic-Connector simply needs access to both servers. From your local environment within the project folder:
- Copy the configuration files to the Kafka instance:
scp -i kafka.pem config/marklogic-* bitnami@<Kafka Server Public DNS>:/tmp - Copy the project jar file to the Kafka instance:
scp -i kafka.pem build/libs/kafka-connect-marklogic-0.9.0.jar bitnami@<Kafka Server Public DNS>:/tmp - Connect to the Kafka server via SSH and move the files to their appropriate location and set file permissions:
ssh -i kafka.pem bitnami@<Kafka Server Public DNS>
sudo mv /tmp/marklogic-* /opt/bitnami/kafka/config

sudo chmod 644 /opt/bitnami/kafka/config/marklogic-*

sudo chown root:root /opt/bitnami/kafka/config/marklogic-*

sudo mv /tmp/kafka-connect-marklogic-0.9.0.jar /opt/bitnami/kafka/libs

sudo chmod 644 /opt/bitnami/kafka/libs/kafka-connect-marklogic-0.9.0.jar

sudo chown root:root /opt/bitnami/kafka/libs/kafka-connect-marklogic-0.9.0.jar
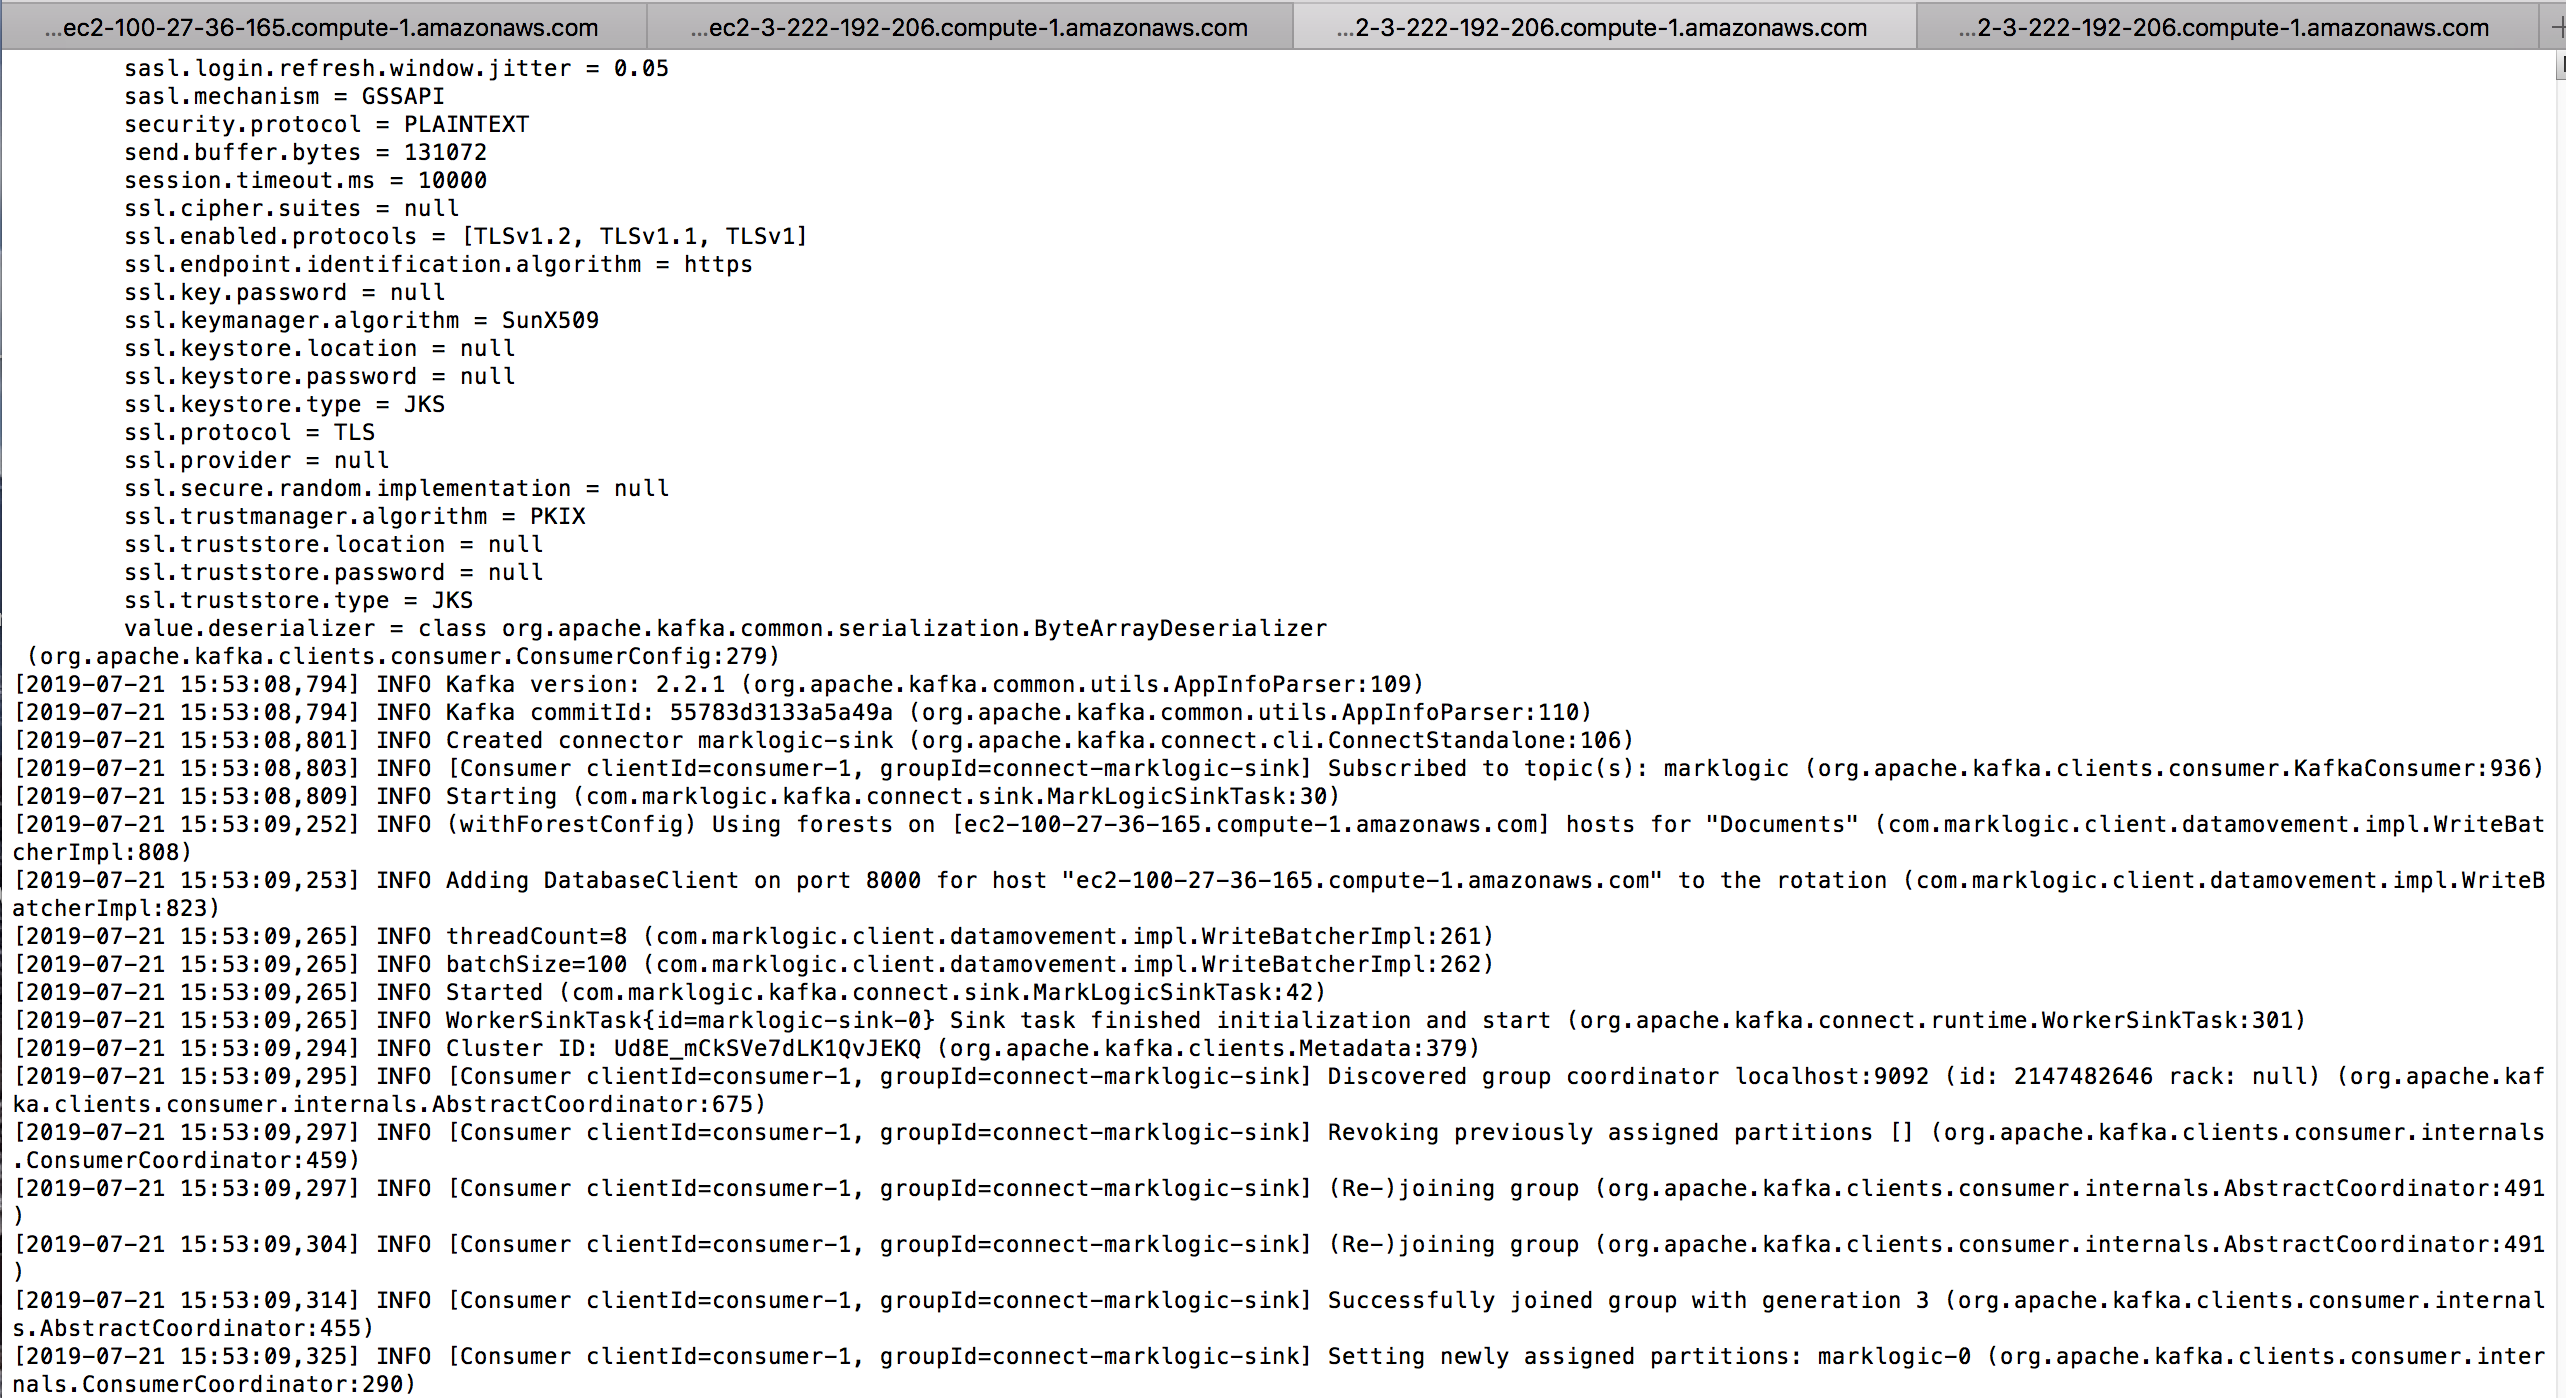
- Run the following command to start the connector (this will take a few seconds to initialize):
sudo /opt/bitnami/kafka/bin/connect-standalone.sh /opt/bitnami/kafka/config/marklogic-connect-standalone.properties /opt/bitnami/kafka/config/marklogic-sink.properties
The figure below shows the end of the output of the consumer after initializing, but before consuming any messages:
Send a Message to the Kafka Topic
- Open another terminal to your Kafka instance:
ssh -i kafka.pem bitnami@<Kafka Server Public DNS> - Edit the producter.properties file to turn off SASL. Comment out lines 46 and 47.
sudo vi /opt/bitnami/kafka/config/producer.properties - Start a basic CLI-based Kafka message producer
/opt/bitnami/kafka/bin/kafka-console-producer.sh --broker-list localhost:9092 --producer.config /opt/bitnami/kafka/config/producer.properties --topic marklogic
Note that the command in step #3 is a single command. Also note that the dashes are double-dashes.
In the producer console (a “>” prompt will be displayed), enter a JSON message. (example: { Foo : “bar” }). The console with the Kafka-MarkLogic-Connector running will display related log messages.
Below is the output of the message producer after starting and after the user has entered a message:

And here is the end of the output of the consumer after initializing and consuming a single message:

Verify the Kafka-MarkLogic-Connector
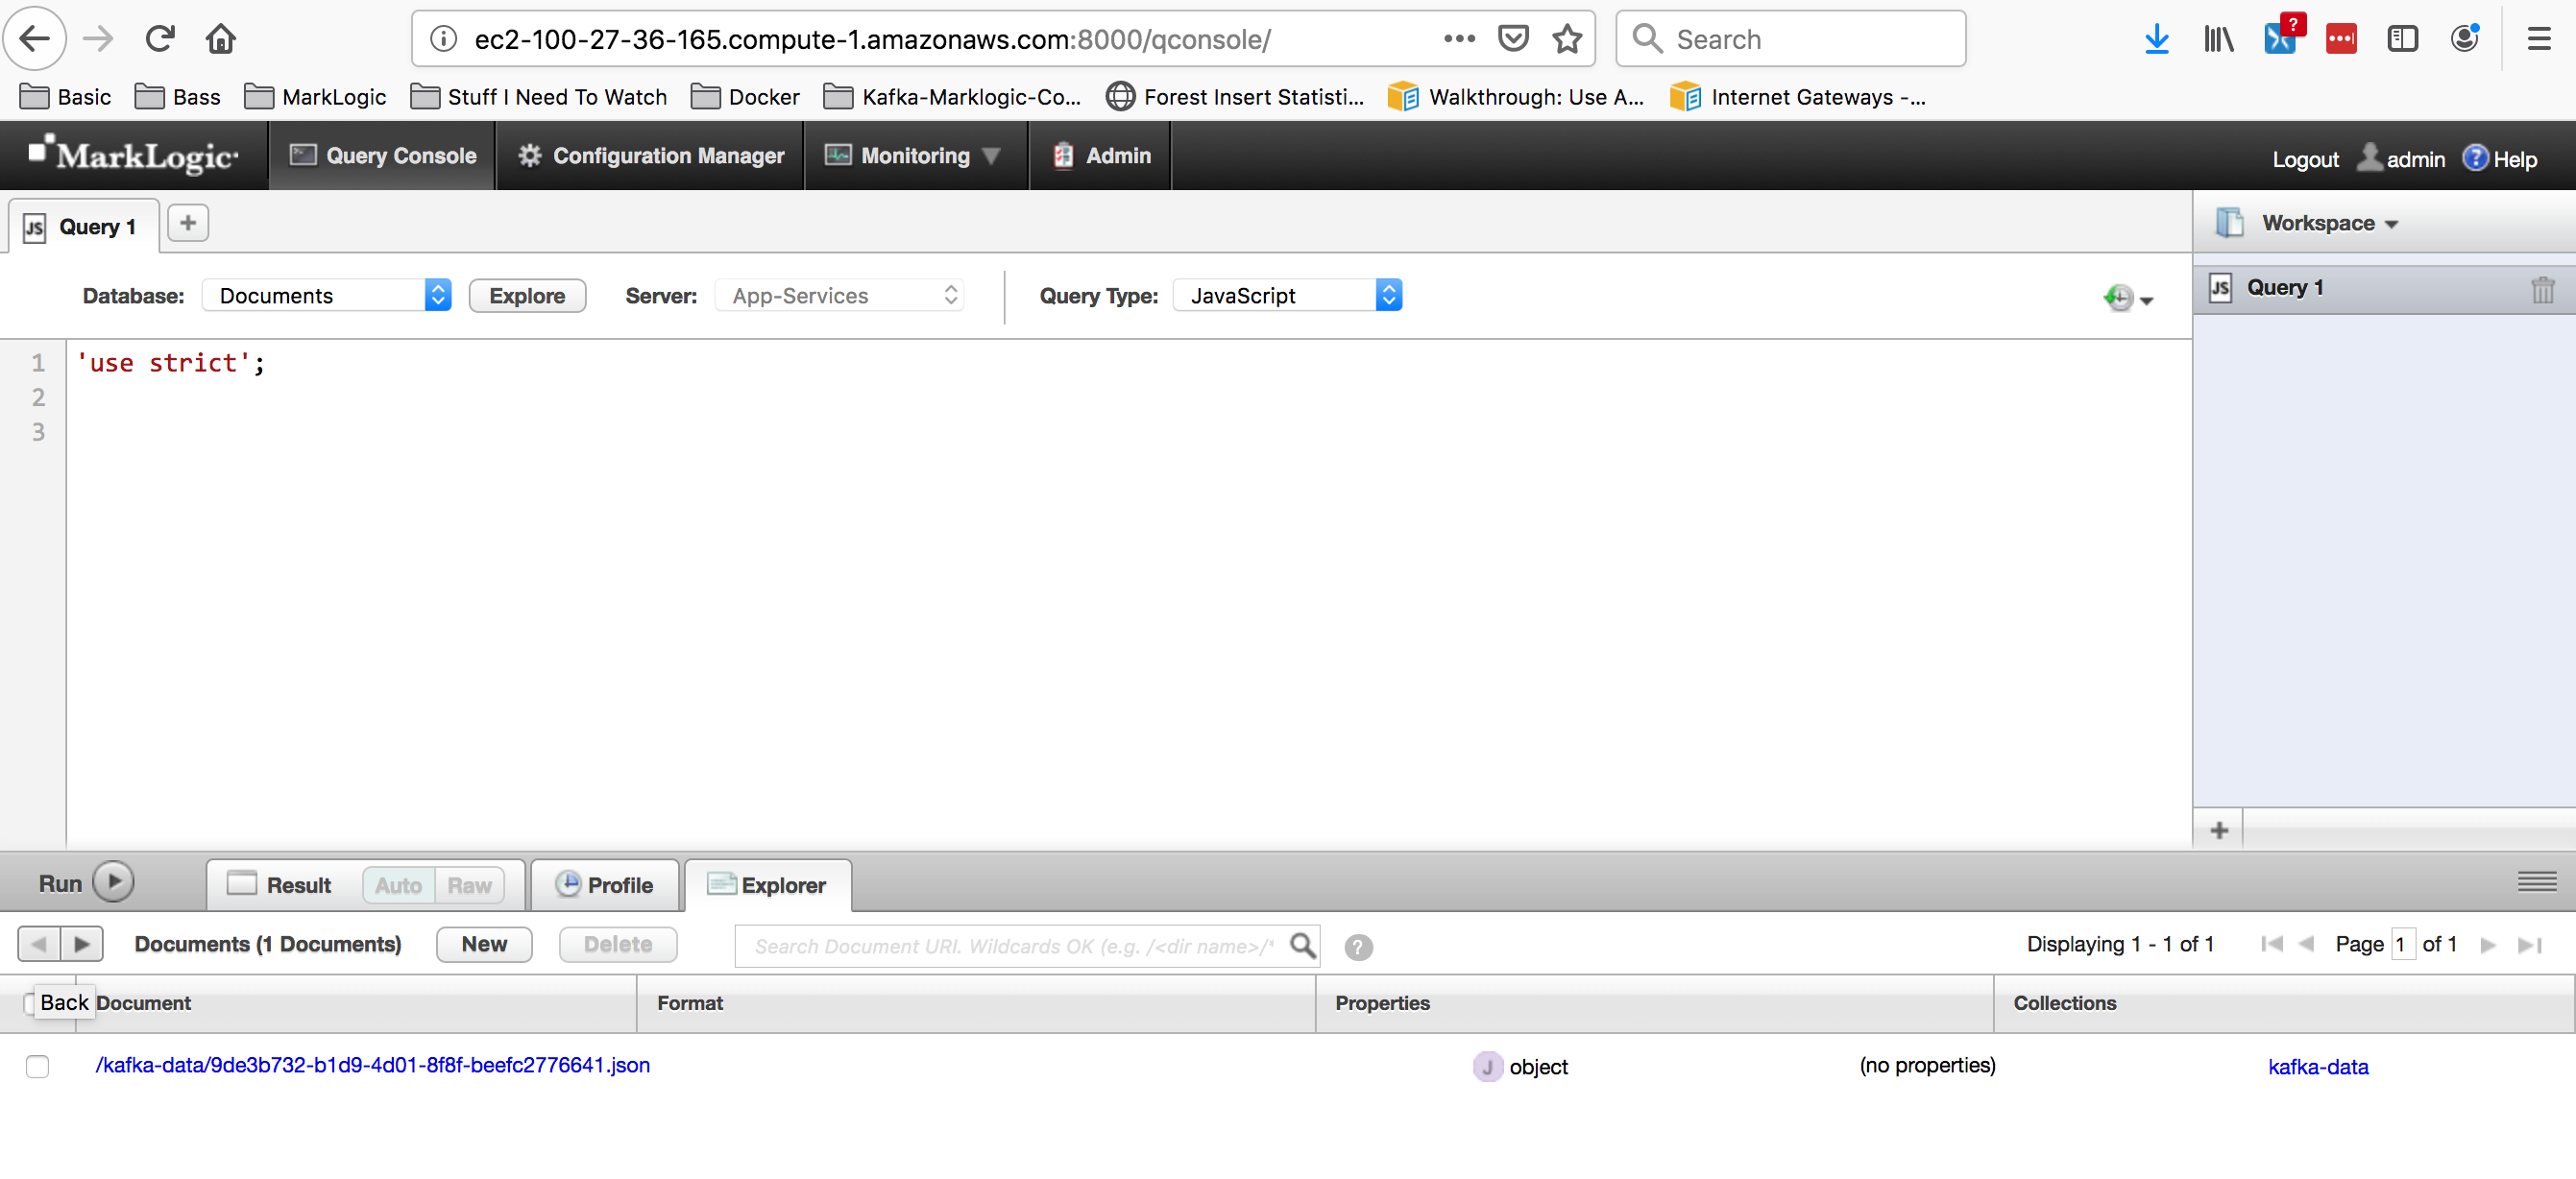
You can use QConsole (http://<ML Server Public DNS>:8000) to verify the message was ingested into the Documents database in MarkLogic. Assuming you did not change “ml.document.uriPrefix” in marklogic-sink.properties, the URI will be of the following form: /kafka-data/{UUID}.json
The following figure is what you’ll see on the MarkLogic QConsole after clicking “Explore,” showing a single document in the database:
Now we’ve created a single message to be consumed by MarkLogic via the connector. If you want to test the connector with higher load, Phil Barber has also created a simple message producer project that you can use to generate messages at a higher volume. Be aware that the AWS instances we created here are small, so don’t go overboard!